Why Focusing on Energy Transfer Is Critical
Whether the goal is hitting farther, throwing harder, pitching faster or executing some other movement at a higher level, the first place many of us go is energy generation. Let’s take pitching, for example.
Pitchers will be encouraged to spend a lot of time on improving their drive mechanics. They’ll be told to do endless box jumps, lunges, dead lifts and other exercises to build more explosiveness into their legs. They’ll be put on devices such as the Queen of the Hill to help them learn to drive out even harder.
Yet improving the amount of drive is only half the battle. What often gets ignored in all this heavy lifting is the importance of being able to transfer the energy they’re generating into the ball efficiently, i.e., with as little energy loss as possible.
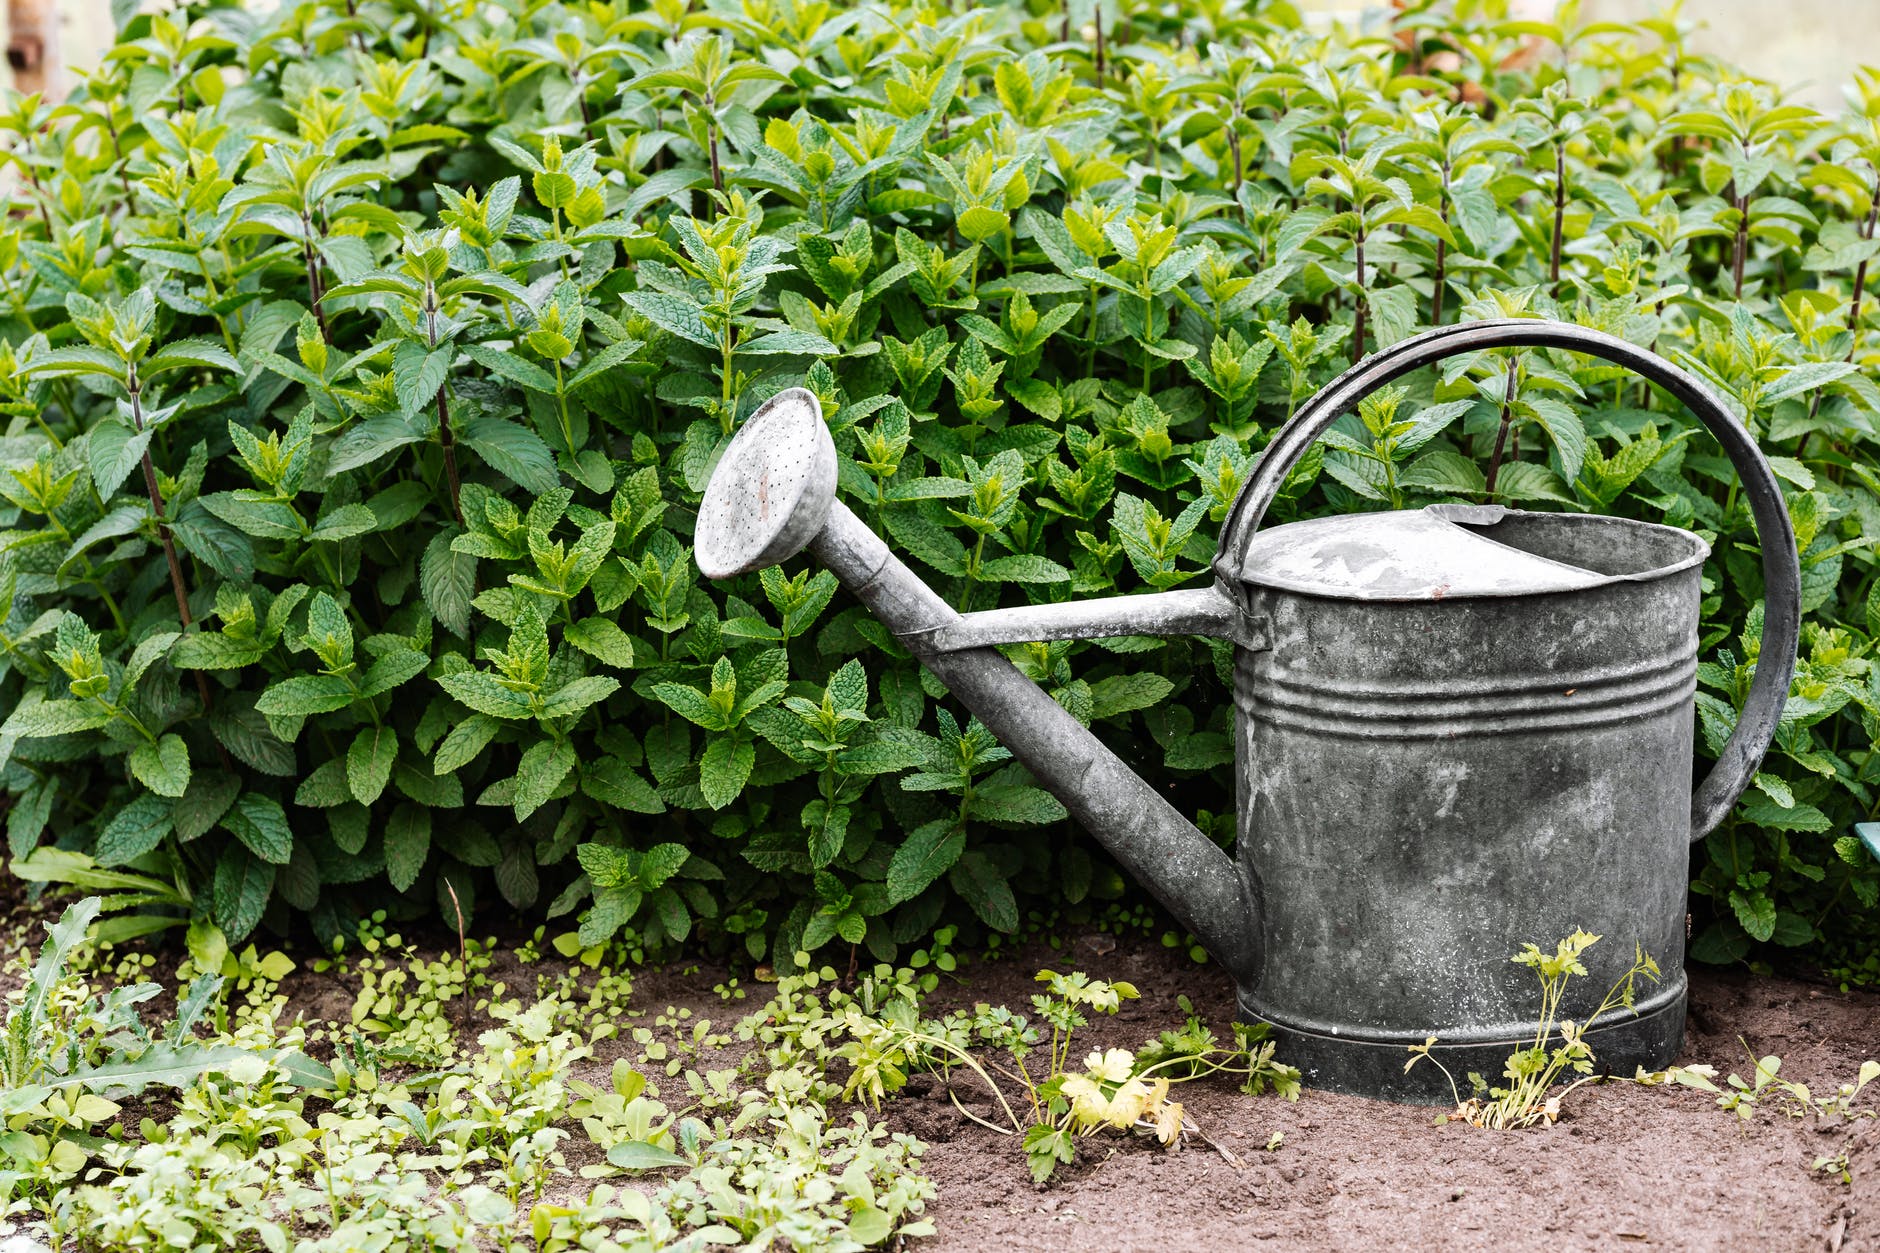
Here’s why that’s important. Imagine you need to move 20 gallons of water from point A to point B, but all you have available is a one gallon bucket. It’s going to take a lot of little trips to move all that water.
Not very efficient.
Now imagine you have a 10 gallon bucket instead. You’ll be able to take a lot more water in each trip while minimizing the number of trips you need to make to accomplish the same task.

The same is true for fastpitch softball skills. No matter how much energy you generate on the front end, that energy is only as useful as your ability to transfer/apply it to the skill you’re performing.
Of course in softball it’s not just about how much energy you can transfer but how quickly you can do it. A sudden transfer will delivery more of the energy into the ball versus a slow one. That’s just physics.
In hitting that means a quick swing that rapidly accelerates the bat to meet the ball at the optimum contact point. In throwing and pitching, that means a rapid series of accelerations and decelerations into the release point.
This, by the way, is one of several reasons why “hello elbow” pitching prevents pitchers from reaching their maximum levels of velocity.
Hello elbow finishes, where you try to muscle the ball through release by straightening out the arm as it goes around the circle, deliberately snap the wrist and then yank up on the arm (mostly after the ball is already gone), are slow, forced movements.
There is no sudden acceleration and deceleration sequence that enables the upper and lower arms, as well as the wrist, to move at different speeds at different times. It’s all one big forced movement, which prevents energy from being transferred – as opposed to internal rotation which accelerates and decelerates the upper and lower arm in sequence and allows the wrist to react to what the arm is doing, amplifying the energy instead of limiting it.

The point is spending all your time on learning how to generate maximum energy isn’t enough. You need to spend an equal amount of time, or maybe even more, on learning how to transfer that energy you’re generating efficiently. Otherwise it’s a lot of wasted effort.
Build yourself a bigger energy “bucket” and you’ll maximize your results with whatever your bring to the table today – and tomorrow.
Photo by Karolina Grabowska on Pexels.com
Wanted: A Better Strategy for Developing Young Pitchers

The other day I was talking with Rick Pauly of Pauly Girl Fastpitch about the challenges of developing young fastpitch pitchers – especially those in the the 8-10 year old range.
Rick said it’s something that has been on his mind for a while, but really came home after completing another of his successful pitching clinics, this time in Fairmont, Minnesota.
The Beginner session included several very young pitchers who worked very hard at the drills and techniques being taught. But clearly they were going to take a while before they were ready to go out and dominate.
The problem is most of them, even the rec league players, often don’t have “a while” before they have to be game ready. It can easily take several months to a year or more for young players to throw strikes on a regular basis.
Most have limited proprioception (body awareness), which means that they can’t feel where various body parts are in space. They may be trying to mimic the movements they’ve been taught or the instructions they’re receiving, but can’t quite feel whether they are successful or not in that moment.
Don’t even get me started on attention span for most of them.
If they continue to work at it they will eventually get it and no doubt become very good at their craft. They’ll be the pitchers who are mowing down the competition left and right, whether it’s racking up tons of Ks or regularly getting out of innings after throwing only 10 or 12 pitches.
The problem is that future competence is not what their youth teams need right now. They need pitchers who can get the ball over the plate.
So what happens? The most valuable pitchers on those young teams are the ones who can throw strikes, no matter how they throw them.
As a result, those girls tend to get the bulk of the innings while those who are taking lessons and practicing all the time get very little circle time. Which means some who might be quite good one day get discouraged and quit pitching while parents who are taking time out of their schedules and paying for lessons begin to wonder whether that investment is worth it.
Look, I get it. While pitching to a large extent may be an individual effort, it’s still performed in the context of a team sport. It’s no fun for everyone if pitchers on both sides are throwing walkfests, and the other eight players on the field (not to mention the team that’s batting) don’t learn much if none of the hitters have an opportunity to hit the ball.
You want there to be some sort of activity on the field that resembles actual softball.
But at the same time, the future of the game isn’t with the lobbers. It’s with those few who are trying to learn how to pitch the right way.
There has to be some sort of solution. I’m sure some of you are thinking “We let the pitchers pitch until they load the bases, then a coach steps in after three balls to pitch.”
That’s ok in theory, but the reality is the coach who’s pitching isn’t helping the hitters much at all. They’re probably not throwing with a realistic motion, and since most want to win the game (because nothing is more important in the world than a $30 plastic trophy) they’re more throwing where the hitter is swinging than teaching hitters to take the bat to wherever the ball is.
It just seems there has to be a better way. I don’t know what it is, but maybe we can all put on our collective thinking caps and figure out how we can enable young pitchers to develop while still making the game fun for everyone else.
One idea is to put restrictions on when pitchers can be pulled. Give them a chance to find their way in a game rather than getting yanked after two or three walks.
Perhaps the pitcher is required to pitch to the full lineup, or half of it until she can be taken out. That might remove some of the pressure she may feel and give her a chance to find her groove, even if momentarily.
Or perhaps we formally loosen up the strike zone to the tops of the shoulders to the tops of the ankles. (I don’t think widening it will help because, well, short bats and short arms.) A bigger zone will also give hitters encouragement to swing more rather than just waiting for the walk, or for the coach to come in and pitch targeted meatballs.
Another idea is to cut the number of outs a team is given at the plate if their opponents are using pitchers who are seeing a recognized pitching coach. In other words, if I am pitching a girl who is taking lessons but struggling, we only have to get two outs to flip the inning. That one might be a little tough to enforce but if the goal is to develop pitchers for the long term hopefully it won’t be abused.
Those are just a few thoughts on our part. Not saying they’re the right way, or the best way, but they might provide a solution.
How about you? Especially those of you who are closer to that age level.
What ideas do you have to encourage young pitchers to keep learning to pitch the right way while not penalizing everyone else on the field? I know we have smart readers here, so leave your comments below and let’s start developing that next generation of pitchers to realize their full potential.
Drill to Help Fastpitch Pitchers Feel the Elbow Lead

I know my last two posts have been incredibly long so going to try to keep this one short and sweet today.
One of the biggest challenges pitchers who are early in their journey, or pitchers who were taught to turn the ball toward second at the top of the circle, have is learning to get and maintain a bend in the arm coming down the back side of the circle. Getting that bent elbow is essential for enabling the body, and especially the arm, to decelerate a piece at a time instead of all at once to generate maximum arm whip (and thus maximum speed).
Usually what happens is the pitcher is very hand/ball-centric through the circle. That makes sense on the surface because what are they going to do? They’re going to throw the ball with their hand.
Yet taking that approach means that when the pitcher comes over the top of her head the momentum she has generated on the front side will naturally carry the hand backward. When that happens not only does the arm straighten out but the ball is actually moving in the opposite direction of the body.
In other words, as the body is driving forward, hopefully at great velocity, all the energy in the lower arm and hand is being directed backward, as if the pitcher is trying to throw to second base. As a result, a lot of the energy that was generated early will be lost, and more of it will be wasted trying to get the ball to start coming forward again. Not exactly the recipe for maximizing speed.
To avoid this issue the arm must start bending before it goes over the top, enabling the elbow to lead through 12:00 and then down the back side of the circle. This can be easier said than done, however, because it’s often difficult for pitchers to feel exactly what IS happening with their arms at that point.
So to address that issue I developed this little drill.
The advantage of this drill is that it is very targeted and tactile. I always say “if you can feel it, you can fix it.”
By having her try to touch the wall with her elbow instead of her hand, the elbow naturally has to bend. She will know instantly if she got arm/elbow bend at this critical moment because the point of her elbow will contact the wall. It the back of her hand touches the wall, the arm is too straight.
If, on the other hand, the ball touches the wall, the arm is too straight AND she turned the ball backward as she came over the top.
I recommend doing this drill 50-100 times a day every day until the arm starts getting into this position naturally. The nice thing is you don’t need a facility or a warm, sunny day to do it. Any convenient vertical surface and an arm’s length of space will suffice.
If you have a pitcher who is struggling to get arm bend/lag in order to whip, give this drill a try. And be sure to let me know how it works for you.
7 Tips to Make 2022 Your Best (Softball) Year Ever

First of all, let me tell you I had quite a debate with myself on whether to write a New Year’s post or just go with a more general topic. But when the stars align – as in the last day of 2021 is also the day I usually put up a new post – it’s a good idea to just go with it.
So here we are. Hopefully 2021 was a great year for you.
We actually had somewhat normal high school, college, and youth softball seasons, although COVID-19 protocols often impacted the spectator part of spectators sports. At least the fans who got in didn’t have to wear a mask on 90-degree days.
Also in 2021, fastpitch softball temporarily returned to the Olympics, albeit in eerily quiet and empty stadiums and played on baseball diamonds. It was sort of like watching a dome game with a field set up for football. The fact that the oddly formatted mini-tournament was finished before the opening ceremonies took place tells you all you need to know about what the International Olympic Committee (IOC) really thinks about our sport.
The Women’s College World Series (WCWS) on the other hand was a TV rating juggernaut, averaging more than 1.2 million viewers per game. That’s 10% more than the 2019 WCWS.
The three-game championship series between Oklahoma and Florida State fared even better, drawing an average of nearly 2 million viewers per game. In the process, we got to see a lot of great softball.
Speaking of great softball, Athletes Unlimited entertained a lot of fastpitch softball fanatics with its playground-brand of choosing up teams and having no coaches on the sidelines. Maybe they’re on to something.
And hopefully you personally had a successful 2021 as well.
Of course, as the disclaimer on every “get-rich-quick” scheme quickly says, past performance does not guarantee future gains. So following are a few tips to help you make 2022 an even better year.
Tip #1: Practice with a purpose
Yes, I know many of you have t-shirts with that very saying on them. But how often do you actually take that approach?
It’s easy to get into the rut of “putting in time.” i.e., going off somewhere and going through the motions of a skill for a half hour or an hour or whatever, or coaches having players performing activities for two, or three, or four hours. None of which will actually help you get better, and could make you worse if the practice is sloppy enough.
If you’re going to practice, then have a goal and go after it wholeheartedly. For example, if you’re a pitcher working on leg drive, then work on getting yourself out faster each time rather than mindlessly doing the leg drive drill you were assigned.
Master the skill, not the drill, and you’ll be a lot better off.
Tip #2: Grow your knowledge
In today’s Internet-accessible world there’s no reason to do things a certain way because that’s how you’ve always done them. There is an incredible amount of research being done in our sport and an incredible wealth of knowledge being shared – if you will open your mind to it.
The National Fastpitch Coaches Association (NFCA) is one of the best. Right now they are in the midst of hosting a series of live coaches clinics around the country that enable top-level coaches to share their expertise with the rest of us.
If you want to go more in-depth on a topic, the NFCA also has its Master Coach program, which offers a combination of live and online courses. I took their very first online Coaches College course earlier in 2021 and it was well worth the time and money. Give it a shot.
There are plenty of private resources as well. PaulyGirl Fastpitch has its High Performance Pitching courses at the beginner, intermediate, elite, and pro levels.
You can learn all about great throwing mechanics from the High Level Throwing program. There’s a cornucopia of hitting courses out there as well.
Then there are resources such as the Discuss Fastpitch board and the Fastpitch Zone and The Bullpen Facebook groups that connect coaches from around the world with one another to share their knowledge and experience. And that’s the just the start.
If you want more knowledge it’s out there. Just be sure to come in with an open mind because some of what you hear may go against everything you’ve ever believed. And that can be a good thing.
Tip #3: Use video
This one doesn’t require a lot of explanation. There’s what we think we see or feel, and there’s what’s actually happening. They’re not always the same.
Virtually every mobile phone includes a high-definition, high-speed camera for free that would be the envy of coaches and players from just 10 years ago. Take advantage of it.
Video yourself or your players often, and see if what you think you’re doing is what you are in fact doing. Compare what you see to the best players in the world.
While you don’t have to match exactly, you should match in principle. If you’re not doing what you think you’re doing, adjust accordingly.
Tip #4: Work on your mental game
Ask any group of coaches or players “who thinks the mental game is a critical contributor to success?” and you’ll probably see every or nearly every one of them raise their hands. Then ask how many take the time during practice or during their free time to work on it and you’ll likely see few (if any) hands.
It’s sort of like Mark Twain’s famous admonition about the weather: everyone talks about it but no one does anything about it.
That is a mistake in my opinion. There are (again) plenty of books and other resources that focus on this aspect of sports. Here’s a list of a few:
- Head’s Up Baseball
- Mind Gym
- The Champion’s Mind
- Championship Team Building
- The Mindful Athlete
- Winning State
- Mental Conditioning for Softball
- The Energy Bus
Invest some real time in developing the mental game – especially the part about overcoming adversity – and you’ll be amazed at what you can do.
Tip #5: Make some time for recruiting activities
This is for those players who want to (or think they want to) play softball in college. If that’s not you, go ahead and skip to Tip #6.
For those still reading, playing softball in college at any level is an accomplishment – and ultra-competitive these days. You’re unlikely to be randomly discovered playing during a local tournament.
If you want to play in college, you need to make an effort to build a relationship with coaches at different schools, and at different levels.
One obvious way is to attend skills camps at schools where you might like to play. While some are just money grabs that have minimal involvement from the college coach, most are both an opportunity for coaches to give back to the game while checking out potential future talent. What better way is there to get them interested in you than to demonstrate your skills in their “house?”
Social media in general, and Twitter in particular, is another great way to establish and maintain contact with coaches. Follow coaches at schools you’re interested in and hopefully they will follow you back.
Share their Tweets with your followers. Send Tweets of your own about your/your team’s latest accomplishments and activities and tag the coach or the program. Be active and be visible.
Just one word of caution about social media: keep it positive at all times. The Internet is written in ink, and more than a few players have eliminated themselves from consideration by their dream schools because of things they’ve posted. That includes photos and negative comments about their parents or current coach.
Present yourself as if the coaches you want to play for are watching every post. Because they are.
Email is still a valid way to contact coaches too. Just keep it brief – they’re busy people and many get hundreds of emails a day. If you want to share a video, be sure the coach can see what you want him/her to see in ONE click. Any more than that and they’ll pass.
This isn’t just for high school players either. While the D1 rules changed and they can no longer contact players before September 1 of their junior years, it doesn’t mean they’re not paying attention to who can play and who is interested in their schools. And there are no such restrictions for D2, D3, and NAIA, although they tend to recruit later anyway.
Recruiting is a marathon, not a sprint, so get out there early and often if you think playing in college might be for you.
Tip #6: Make time for rest and recovery
When you’re dedicated to something it’s easy to overdo it. Don’t let that happen.
Rest and recovery is just as important to high performance as training. Your body needs time to build itself back up after intense activity. So does your mind.
It’s ok to take a day or two off each week during the season as well as during the offseason. Your body and your brain will tell you how much you need for peak performance. You should also plan on taking at least a couple of weeks off at some time during the year for deeper recovery.
Oh, and this applies to coaches too. You’ll find coaching is a lot more enjoyable if you let your batteries recharge now and then.
Tip #7: Resolve to have fun
This is probably the aspect that has been most lost over the course of the last 10-20 years. Yes, we have more technology that can tell us more things, and more practice facilities that enable us to keep working even when the weather is at its nastiest, and more opportunities than ever to take our game to a higher level.
But the tradeoff has been more pressure and more stress to the point where playing (and coaching for that matter) feels like a job. And not a particularly pleasant one.
It’s important to remember that softball is a game, and games are supposed to be fun.
That doesn’t mean it should be like a birthday party without the cake. But it shouldn’t be like studying for finals while waiting to see the dentist either.
Fun in most cases is what you make it. Some people enjoy really digging into things and pushing themselves to their limits. That’s right for them.
But it’s not right for everyone. Others will find their fun in getting a little better each day without killing themselves, competing (in a friendly way) with their teammates, or in being part of a team.
Understand what’s fun for you and then find/create a team with others who share your definition and goals. Like using the wrong pair of cleats, being on a team that isn’t a good fit can be painful.
Good luck to everyone, and I hope you make 2022 your best year ever!
Photo by Damir Mijailovic on Pexels.com
Light Bulb Moment: Athletic Efficiency

One of the concepts that can be tough for a young athlete (not to mention many adults) to understand is that stronger is not always better.
What I mean by that is that in their desire to throw harder, hit harder, run faster, etc. fastpitch softball players will often equate muscling up or tightening up with improved performance. They tend to take a brute force approach to their movements, assuming that if they work harder or produce more energy then they will ipso facto see better results.

Yet that isn’t always the case. In fact, sometimes the attempt at creating more energy through brute force works in the opposite manner by locking up joints or slowing down movements which reduces the amount of that energy that can be transferred into the activity.
In other words, despite the increase in energy the overall usage of energy becomes less efficient.
The reality is there are two key elements to maximizing athletic performance in ballistic movements such as pitching, throwing, hitting, and running.
First you have to create energy. Then you have to transfer that energy.

The brute force approach may work with part one. But it often gets in the way of part two, which means much of the energy the player worked so hard to create is wasted.
Makes sense, right? But how do you explain that to a player without making it sound like a science class lecture – at which point your voice starts to sound like Charlie Brown’s teacher?

The light bulb moment for me came when I was thinking about a light bulb I needed to replace during a lesson. Perhaps this will help you too.
Think about two types of light bulbs: the standard, traditional incandescent bulbs most of us grew up with (and that are now difficult to find) and LED bulbs.
If turn an old-school incandescent bulb on and leave it on for a few minutes, what happens to its surface? It gets hot. Very hot. As in don’t touch it or you will get burned.
That’s because while an incandescent bulb may be labeled 60 watts, not all of that wattage is going into creating light. In fact, much of it is being wasted in the form of heat.
Now think about an LED bulb. You can leave a 60 watt LED bulb on for an hour, then go over and put your hand on it without feeling much of anything. (DISCLAIMER: Don’t actually do that, just in case.)
The reason is that 60 watt LED bulb isn’t actually drawing 60 watts. That’s just a label the manufacturers use to help consumers know which bulb will give them the light level they’re used to.
In fact, that 60 watt equivalent bulb may be drawing as little as 8 actual watts to deliver the same amount of light as a 60 watt incandescent bulb. Since its purpose is to create light, not heat, the LED bulb is almost eight times as efficient as the incandescent bulb.
Now that’s apply that to softball. A pitcher who is nearly eight times as efficient in her mechanics as the next player will throw much harder with the same level of effort.
Conversely, she can perform at the same level as the other pitcher with almost no apparent effort at all. She is just much better at harnessing whatever level of energy she is creating and delivering it into the ball.
The same is true for hitters. Most of the time when you see a home run hit it doesn’t look like the hitter was trying to go yard. She just looks smooth as the ball “jumps” off her bat.
This is not to say strength isn’t important. It is.
Remember part one of the formula: you have to generate energy. Great training in mechanics along with intelligent sport-specific or even activity-specific training is critical to achieving higher levels of success.
But it’s not enough.
Understanding how the body moves naturally, and using those movements to take full advantage of the energy being created, will help players deliver higher levels of performance that enable them to achieve their goals and play to their greatest potential.
Hope this has been a light bulb moment for you. Have a great holiday, and take some time to relax. You’ve earned it.
The Challenge of Making Changes

“If you always do what you’ve always done, you’ll always get what you’ve always gotten.” This quote, generally attributed to car magnate Henry Ford, explains in a nutshell why fastpitch players, parents and coaches should constantly be seeking new information and new techniques. After all, who doesn’t want to get better?
What’s hidden underneath the surface, however, is a fairly large obstacle: change is (or at least can be) difficult. Which means even if you’re making the right changes for the right reasons it doesn’t always work right away.
How many times have you watched a pitcher attempt to improve her mechanics and seen her speed go down a little instead of up? How many times have you watched a hitter take her swing from looking like an unmade bed to a well-organized attack and yet she suddenly struggles to hit the ball as hard as she did?
At that point its tempting to wonder if you’re actually helping her, or if she is helping herself. Why is she losing ground instead of gaining it?
To answer that question I have a little challenge for you. If you are over the age of 5 I presume you know how to use a fork and a spoon competently enough to feed yourself without making a mess. You can probably do so fairly quickly, without thinking about it.

Now try switching hands and doing the same. In other words, if you normally eat with your right hand, try eating with your left. (For extra challenge, try it with chopsticks, especially if you are not native to them.)
Suddenly, something you do every day without even thinking about it becomes more awkward and difficult. You have to think about how to scoop/stab the food to keep it on the spoon/fork/chopsticks, the angle of the utensil as it approaches your mouth, keeping the utensil steady as you get close to your mouth and a few other things you probably haven’t considered since you were a toddler.
And if you go long enough, or try to go too fast, you will probably find some of that food dribbling down your chin or dropping into your lap. You will probably also take longer than if you had used your usual hand.

It’s not that you don’t know how to eat. It’s that you’re doing it in a way that is unfamiliar.
That is the same experience athletes typically have when they are trying to make changes or learn something new. The technique they were using previously may not have been ideal, but they were comfortable with it and could execute it quickly and without thinking.
Now, as they try something unfamiliar, those same movements feel awkward and uncomfortable. They actually have to think about what they’re doing, and that slows the entire process.
So rather than quick, energy-driven, ballistic body movements they’re making movements that are labored – slowed by the conscious thought of trying to do what they’re now supposed to do.
So what’s the solution? Time. You know, that thing that all of us try to rush through to get to the great results.
Essentially what has to happen is the new movements have to be able to be performed with the same comfort level as the old ones to see the gains. That doesn’t usually happen right away, even with elite athletes.
Instead, it takes conscious work and effort to learn the new movements properly and build the confidence required to execute them with 100% energy.
The best way to do that is start slowly and work from short distances, preferably into a net, wall or other large surface. Get the feel of the new movements, then gradually increase the speed.
The coach or athlete should use video to check her movements and be sure she is not falling back into old habits as speed increases. If she is falling into old habits, slow it back down, get it right, then try increasing the speed again.
Once she is comfortable at a good speed, start moving toward a more game-like experience. For pitchers (and overhand throwing), that’s increasing the distance to see if the quick movements can be maintained.
For hitters, it’s moving off the tee into front toss – easy at first, then gradually increasing the speed. If you have access to a pitching machine and can feed it competently, you can use that as another step before having the hitter face a live pitcher.
This gradual, stepped progression will give the athlete an opportunity to replace old habits with new in a way that allows her to focus on the process, not the outcomes. By the time outcomes come into play she should be able to execute the skill with full energy and attack – at which point you will see the gains you’re looking for.

It’s not easy to do this. Most athletes just want to do the full skill rather than step through progressions, at least a first. But it’s worth it in the long run.
If you have an athlete who is working to make changes but not seeing the benefits yet, be patient and trust the process. If she’s working on the right changes, and working diligently, it will happen.
In the meantime, grab that carton of chow mein and try eating it with the opposite hand. It will give you a greater appreciation of just how difficult it can be to do something old in a new way.
Photo by RODNAE Productions on Pexels.com
Fastpitch Player’s Holiday Gift Guide

Ok, I know I’m a little late on this for Hanukkah but who knew it would be so early this year? I guess just bookmark it and have it ready for next year.
For those with holidays still coming up, however, here are a few ideas for gifts that I think will not only be good for immediate satisfaction but could potentially have an impact on your favorite player’s entire career. I am not including gloves or bats since you probably have already thought of those. I wanted to go a little outside the box.
And in case you’re wondering, no, I’m not being compensated by any of the companies mentioned or linked to for including them (or anything else for that matter). These are just products or services I’ve found to be valuable and think you will do.
Enough preamble. Let’s go shopping.
High-quality batting tee
This is an essential piece of equipment for any player. Even non-hitting pitchers can use it to practice locations as I showed in this post.
The typical use, of course, is for hitting. Tee hitting is for working on mechanics without the challenges of timing a moving ball. If you’re trying to get the proper sequence (hips-shoulders-bat), fix your bat path, learn to tilt properly or solve any other mechanics issues a tee is your best friend.
That said, there are a lot of choices for tees out there. I prefer one that doesn’t have a base that looks like home plate, because when it does look like home plate hitters tend to line up on the tee in a way that is not conducive to great hitting.
Tanner Tees were the original to develop the particular design I favor, although for durability (and resistance to getting easily knocked over) I really like the Jugs T. For younger players, or older players who have trouble with low pitches, the Jugs Short T is also a great choice. You can read more about the Short T in my product review here.
Jugs is also apparently coming out with a combo package that includes both heights. Doesn’t look like it will be available until next year, though, so maybe save it for a birthday or graduation gift.
Large, easy-to-set-up net
If you are getting a tee you’ll probably want to get a net to hit into. That way you can hit in the back yard, basement, garage, or other space without damaging your home or having to chase after the balls.
Bownet is probably the best-known brand at this point. You see their distinctive orange nets at pretty much every game and tournament (although they have a variety of colors available now). But Tanner, Jugs and others also have nets that will do just fine.
Of course, it’s not just hitters who can use a net like this. Pitchers can use one to practice their mechanics from a short distance. Field players and catchers can use them to develop their overhand throw velocity. And so on.
A net like this will pay for itself many times over. And when you’re done with it, if you’ve bought a good quality one you’ll be able to sell it and recoup part of your investment in cash. Pretty good deal overall.
Quality softballs
There’s something about working with nice, bright, shiny new softballs that helps players feel better about their practice time. After all, it’s a lot easier to take pride in your practice time if you’re not using crappy old, beat-up, dirty softballs.
That said, there are all kinds of softballs from many different manufacturers, from the really cheap to the really nice. It’s hard to know which ones to purchase.
My ball of choice right now is the Mark One NFHS 12″ softball. They are real leather balls with a .47 COR and raised seams, among other features.
What I like about them is they are comparable in quality to Worth Dream Seams but generally cost less. I use them for hours a day, nearly every day (including having hitters beat them into metal backstops on a regular basis) and they hold up well. They also have great grip so pitchers like to use them.
But check around the Internet and you can find several high-quality softballs to make your favorite player happy.
Video analysis app
I recently did an extensive product review on a video analysis app called OnForm. It has a lot of great features, including an auto-detect function that would allow a player to set up a device on a tripod and then have it record pitches, swings, throws, etc. when it sees motion.
But there are others out there as well. Kinovea is one that comes to mind, although you can only use it with a computer, not a phone or tablet.
With this type of software a player can record herself and scrub through it to see if what she’s doing is what she thinks she’s doing. Or she can send the video to a coach who can help her with it.
The value of being able to see yourself in slow or stop motion cannot be overestimated. In fact, high speed video analysis has been crucial to busting many myths and mis-teachings that grew up over the years.
If you can’t find a free version, find something you can afford. It’s worth it.
Polyballs
These are the pliable balls with different weights that you can use for a variety of different types of arm training. They’re great for pitchers, catchers and field players to help develop safe throwing mechanics and improve overall arm and shoulder strength.
Polyballs have grown in popularity over the last couple of years so there are a variety of sources from which you can obtain them. I personally use the balls from Velolab Softball, which comes with a free training program. Austin Wasserman’s High Level Throwing is another source, where they are called Lightning Balls.
One of the great things about them is you can throw them into concrete walls, or plywood, or pretty much any solid wall without damaging the wall or the balls. They make an audible “slam” sound too, so the harder you throw the more satisfying the sound. The lighter ones might even be able to be thrown into drywall, although I would test that theory in an out-of-the-way place first before tossing one in the living room.
Radar device
In my opinion, having some way to measure speed is critical to the development of pitchers, extremely helpful for overhand throwing, and even has some benefits for hitters. I like to call the radar the “pitcher’s accountability meter” because if she takes a pitch or two off, or goes the other way and tries to over-throw/over-muscle the ball, the radar calls her out immediately.
I am personally a huge fan of PocketRadar devices. The Ball Coach is good, but the Smart Coach is worth the extra money if you can swing it because it will not only capture the speed but enable you to embed it in a video capture at the same time. You can read my review of the Smart Coach here.
(If you use your PocketRadar often you’ll also probably make up for the cost difference pretty quickly with the money you’ll save using power blocks instead of alkaline batteries.)
Whatever brand you decide to get, however, my suggestion is to do it often rather than just bringing the radar out now and then.
If you only use it occasionally it becomes a big deal and the pitcher tends to tense up. If it’s part of a regular routine she will not be as intimidated and you’ll ultimately get better readings. I learned that lesson the hard way!
Pitching mat
There are a few good reasons to give your pitcher a good quality pitching mat for the holidays. One of which is saving wear-and-tear on your floors, especially if your pitcher has a heavy drag.
But beyond that, a pitching mat with a built-in pitchers plate can help pitchers learn to use the plate as part of their launch. A center white stripe can help them feel whether they’re going straight or striding out to the side.
If you do decide to get a mat one thing to check into is the type of backing it has. Some are better than others for different types of surfaces.
For example, a rubber backing will be great on a gym floor or other wood floor but may tend slip on turf. There are mats specifically designed for turf surfaces (although not all turf will hold the mat equally well), but they don’t translate too well to a fieldhouse or gym floor.
They have varying lengths as well. Some will extend roughly eight feel in front, pretty much covering the whole stride, while others are just designed to hold the pitcher’s plate itself. A little Internet research will turn up many options and sellers at various price points.
And for outdoors or long turf, the Portolite Mat with the spike backing will hold in conditions where other won’t. You can read my review of this product here.
Pitcher launch aids
One of the greatest challenges many pitchers face is getting a strong launch/leg drive. While some come by it naturally, most have to have it trained into them at some level.
The key is to get pitchers to get their hips moving out in front of the pitching rubber as they go into launch rather than sitting down on it. Three devices I’ve used to help them feel it are the Power Pod, the Softball Power Drive, and the Queen of the Hill.
Each of these goes about it in different ways. The Power Pod from Softball Excellence adds a little springiness to the initial move to go out, helping get away from “dead leg syndrome.” As a bonus, I also find it pretty handy for helping pitchers learn how to spin the curve and rise (although it wasn’t designed for that) and for teaching hitters to stride straight instead of away from the plate.
The Softball Power Drive, which is endorsed by Amanda Scarborough, helps pitchers feel the sprinter’s lean and forward angle of the body rather than sitting straight down on the pitching rubber. If they’re dragging the drive leg like an anchor they’ll feel it pretty quickly.
Then there’s the Queen of the Hill, which I’ve reviewed previously. Its sliding plate is great for teaching pitchers to drive their drive foot back instead of just running past it. If you push into it you’ll hear a “click-click” which tells you you did it right. If you don’t, no click.
You can also use these devices in combination. For example, put the Queen of the Hill behind the stride foot to encourage that foot to engage the ground before moving forward, and then the Softball Power Drive or Power Pod on the drive foot to encourage more drive as you come through.
Generating forward energy is critical to maximizing pitch speed. These devices can help.
PaulyGirl Fastpitch/High Performance Pitching online program
So, this is probably more of a secondary gift. I’d guess 99% of pitchers wouldn’t be interested in doing the training themselves, but if a parent or coach did the worked through the High Performance Pitching training program he/she could convey the information to the pitcher – at which point she would benefit greatly in my opinion.
Renowned pitching coach Rick Pauly has put together an extensive, detailed program broken into Beginner, Intermediate, Elite, and Professional levels. It’s all video-based and self-paced, which means you can go as slowly or as quickly as your time budget allow.
You can also pick and choose what you want. So if you just want help with the curveball you can take that module without having to go through the entire Elite level course.
If you’re interested in more information you can read this blog post which goes into much greater detail.
That’s a wrap
So there you have it – fairly exhaustive list. I could probably do more but if you’ve made it this far you’re already made of stern stuff. Have to stop somewhere.
Of course, for other ideas, you can use the search function in the left column and put in “Product Review.” You’ll no doubt find a few other ideas.
In any case, happy holiday shopping! Just remember, no matter what you buy it’s the archer, not the arrow, that really makes the difference.
Product Review: OnForm Video Analysis and Messaging Software

One of the most important tools a coach or instructor can have in their toolbox (and on their phone) is a video analysis app.
The ability to provide instant, visual feedback, including the ability to mark it up like John Madden diagramming a football play, is invaluable in helping players develop. As is the ability to review it later and offer more in-depth analysis.
I started many years ago with the mobile version of RightViewPro, then moved to Coaches Eye, which I’ve probably used for 10 years or more. It could be clunky at times, especially because if you wanted to be able to search for a particular player’s video later you had to manually tag each one after you shot it, but it got the job done.
Then in September I received an email from TechSmith, the creators of Coaches Eye, that they had decided to discontinue the product and would no longer be supporting it. They generously gave a one-year sunset period, but it meant I had to find a new app to use for my students.
I had played around with Hudl Technique before, but when I checked them out I discovered that product was also going away because it was being replaced by an app called OnForm, which is available on the Apple and Android platforms. I decided to check it out, and let me tell you I am very glad I did.
(At this point I think it’s important to point out that I purchased OnForm with my own money, and I am not being compensated in any way for this review nor do I get anything if you click a link or download the product. I have no affiliation with them whatsoever. I am strictly sharing my experience with the product to help you if you’re looking for a video analysis app for your own use.)
Core Usability
OnForm takes what most of us liked about Coaches Eye and similar apps and kicks it up a notch. For example, you can specify higher capture rates (up to 1080p) and shutter speeds to minimize blurring when you capture a video. Very handy, especially in the lower light conditions you typically find indoors.
Rather than storing all your videos on your device forever, OnForm lets you choose how long after you shoot them you want to keep them. After that they are stored in the cloud, where you can access them on-demand.
One of the best overall features, especially if you are a coach or instructor, is how the videos are organized. You create a folder for each player on the main page by clicking on the + button in the upper right hand corner and following the directions. You can choose whether you want to add a person for one-to-one coaching, add a team, or connect with another user who has sent you an invite code.

Once you’ve set up your first player, all the rest follow the same template for sport and role, so all you have to do is fill in the name. It just takes seconds to set someone up, but from then on you can open their folder and all the videos you shoot automatically are saved to that folder.
As someone who shoots a lot of video, sometimes in a single night, that is a huge time-saver. The videos within each folder are saved by date, and you can choose whether to share them with the player/parent automatically or just keep them to yourself. You can even import outside videos in other apps on your device, although only on a one-off basis unless you are importing them from Hudl Technique.
Live Analysis
Now let’s talk about usability. When you open the video you have a pretty standard toolset where you can mark straight lines and arrows, freehand lines and arrows, circles, squares/rectangles and even a single line that shows the degree of tilt or angle.

Additionally, there is an angle tool that not only lets you measure various angles initially but also enables you to change the angle if you did it wrong by clicking on it. Former Coaches Eye users will really appreciate that. Actually, you can do that with any of your markings but it’s particularly useful on the angle measurement tool.
You also have some interesting tools such as a stopwatch so you can measure how long it takes to execute a skill and a measurement tool that lets you mark distance. For the latter, think of measuring a hitter’s or a pitcher’s stride, or how far a bunt traveled, etc. As long as you know one reliable dimension you can mark that and OnForm will make the rest of the calculations for you.
Perhaps the coolest tool, and one they just added a couple of days ago (late November 2021 for those reading this later) is the skeleton tracking tool.
With the click of an icon OnForm will automatically mark every joint in the body and draw lines between them. Then, as you play or scrub the video, the skeleton lines will move with the player providing an unprecedented look at how how/she is moving through space. If the sequence of movements is important to you, you’re going to love this tool’s ability to display it.
Incidentally, the skeleton tracking overlay isn’t just for new videos. You can apply it to any video you’ve shot.
The toolset is rounded out by several additional capabilities, including:
- The ability to play videos through at full, 1/2, and 1/4 speed off a dropdown menu
- Two scrubbing tools – one which moves quickly through the movement, letting you go back and forth, plus a wheel that makes much finer movements so you can show subtle details
- An undo button to remove one line, circle, etc. at a time as well as a clear button to remove all markings
- A compare button that allows you to bring in a second video, whether it’s a previous video from that player or a pro example you’ve stored in a Reference Content folder, to provide a side-by-side comparison
- The ability to flip the video, which is handy if you want to, say, compare Cat Osterman or Monica Abbott to your right-handed pitcher
- Ability to trim the video to get rid of time between activities or other excess footage
- Editable titles and tags so you can mark exactly what was happening (such as which pitch a pitcher was throwing)
- Ability to edit the name, I suppose in case you got it wrong or the name changes
- Ability to save certain videos as favorites so you can find them more easily later
That’s a lot of capabilities, right? But we’re not done yet!
Recorded Analysis/Online Lessons
If you want to wait until later to analyze the video and then share the file with the player or parent, you can also do that. The Record feature gives you the option of recording the screen and live sound or just the screen.
You can pause the video in the middle or record straight through. Once it’s recorded it automatically plays a preview so you can check your work.
From there you can save the video as-is, trim the front or back, or discard it. If you’re happy with it you can share it directly through OnForm (if you’ve invited the player to join) or through email, messaging or some other app.
Pricing
Ok, now it’s time to get to the nitty-gritty. OnForm offers four different packages depending on your needs. Each comes with a one-week free trial so you can see whether it’s what you want. Be sure to double-checking pricing here since it may have changed since this blog post was written.
The first is a Free package that limits you to 10 videos in your account. If you don’t think you’ll be using it much, but want the option to shoot the occasional video, this one should work for you.
Next up is the Personal package, If you’re working with your own kids only (as opposed to coaching a team or being an instructor) this one should work for you. For $5/month or $49/year you can capture, store and analyze up to 500 videos as well as create up to 5 analysis videos in a 30-day period.
The Coach package (which is the one I have in case you’re interested) provides unlimited videos and analyses/voice over lessons for one coach, as well as allowing any invited athletes to upload unlimited videos to you for free. It also gives you the ability to create notes to go with each video and broadcast lists to reach multiple players at once. This package isn’t cheap, at $29/month or $299/year, but if you plan to use it a lot I think you’ll find it’s worth it.
Finally, OnForm offers the Team/Academy package, which includes everything in the Coach package along with the ability to create three (3) coach accounts rather than one so multiple coaches can access and use the same videos. That one is $69/month or $699/year. It’s probably best-suited to collegiate teams, large travel programs or facilities that offer teams.
My Take
So how is it in practice (no pun intended)? I think it’s tremendous, and a significant upgrade over the products I’ve used in the past.
Creating the videos and marking them up is fast, easy and reliable. They are really helpful with illustrating what is happening and what needs to be done. For pitchers I love being able to draw a single line and show the forward/backward tilt of their bodies.
As previously mentioned I love the way the videos are organized. Rather than having to come home and tag each video, they’re already in the right folders and available. I’ve even moved some videos into one of the Reference Content folders so I can easily call them up to show what famous fastpitch players do.
The analysis tools are easy to use as well, and I definitely love being able to easily discard a video and start over rather than having to wait for it to render (as I did in Coaches Eye) before I could delete one I knew went bad.
Do I wish it was cheaper? Of course, who wouldn’t? But the value is there, and OnForm is continuing to develop the product and add new features so as long as the value is there I think it’s worth paying the price.
Finally, there is their support. When I contacted them to ask why the skeleton tracking feature wasn’t showing up in my iPad they got back to me within 12 hours to explain you need an A12 chip or higher for that feature to be available.
Bummer, but at least they got back to me quickly which is great. They also have a way for users to request new features (I’m going to ask for a clock face drawing tool), and a blog to keep you up-to-date when something new is introduced.
I wholeheartedly recommend OnForm as a training tool for fastpitch softball players. As a bonus, you can use it for many other sports and activities as well, so if you have, say, a softball player and a golfer, one instance will work for both.
Check out the free one-week trial. I think you’re going to let what you find.
Check the Big Picture Before You Hit the Panic Button

One of the most important characteristics that drives (or at least should drive) youth athletes is the desire to be better this week than they were last week.
That doesn’t mean leaps and bounds better, like suddenly jumping 5 mph in pitching or hitting the ball 50 feet farther as a hitter. But, as Bobby Simpson says, getting a little better every day.
So it can be pretty distressing when, say, a pitcher goes to a lesson or practice and her highest pitch speed that day is a couple miles an hour off of her personal record. The pitcher may get discouraged and question her self-worth, and her parents may panic thinking something is horribly wrong. And, of course, her coach will be doing everything he/she can think of to try to get the numbers back up.
Sometimes, however, the issue isn’t a mechanical flaw or a lack of effort. Sometimes that’s just all that player has to give that day.
This is especially true for multi-sport athletes. A fastpitch softball player who is also in-season for a high-impact, energy-draining sport such as basketball, volleyball, ice hockey, field hockey, swimming, tennis, etc. may find it difficult to maintain her highest level of performance when she leaves her other sport’s game or practice and goes to her softball event.
Think of it like a glass of water. The player starts out with a full glass.
During the other sport’s game or workout, the glass begins to empty. Depending on the intensity she may drain it completely.
When it’s over, she moves on to softball. Along the way the glass starts to fill again, but it may not quite make it back to the top before she has to go out and perform again. So she’s starting with a less-than-full glass.
In some cases, it may not have even filled halfway again. So to expect her to perform at her highest level will be unrealistic because the energy is simply unavailable.
And that’s just the physical side. There is also the mental component.
It can be tough to switch gears, especially after a game where there is competition and pressure. She comes down from that, then has to crank it back up for softball? It may not happen.
Of course, this isn’t just limited to mental drains due to sports. Other factors can be involved as well.
Students struggling with a course load, or a particularly difficult class, or facing a tough test or finals may find they can’t work up the fine level of focus required to do your best. Musicians preparing for a concert, recital or competition, actors looking at the premiere of a play, debate team members in deep preparation and so on all have distractions that could prevent them from performing at their best.
Finally, there are friend and family dramas and social media issues to consider. While they may seem small to you, to an adolescent or pre-teen the issues may seem overwhelming – or at least challenging enough to get in the way of top-level performance.
Now take two or three of those issues and combine them and it’s easy to see that while the player may be willing she just doesn’t have enough in the tank to perform her best.
With pretty much all sports and activities (not to mention life in general) being year-round, there are no easy solutions. Just saying “suck it up and rub some dirt on it” doesn’t do anything but add to the frustration (and anger).
Best we can do is understand that, just like at work, kids are going to have good days and bad days. Some days they’ll be all charged up no matter what is going on in their lives. And some days, well, they’re just going to have to give the best they have and call it a day.
The measurables may not be there, but it doesn’t mean they’re not getting value. If anything, they’re learning how to perform in the last Sunday game of a long tournament played in 95 degree heat and high humidity.
So if your daughter doesn’t seem to be performing at her highest level don’t be too quick to hit the panic button. Take a look at what else is going on her life.
It could just be a temporary bump in the road that will solve itself when she’s not so pressed with everything else.
Photo by Pixabay on Pexels.com
Why Internal Rotation Produces Better Fastpitch Pitching Results

The other day I came across a great post on the Key Fundamentals blog titled Softball Pitching Myths Pt. 2 – Hello Elbow by Keeley Byrnes.
Keeley is a former pitcher and now a pitching coach in the Orlando, Florida area, and her blog has a lot of tremendous content on it. I highly recommend you check it out and bookmark or follow it as she has a lot of great information to share.
This particular post is a good example. It seems that “hello elbow” mechanics – turning the ball toward second at the top of the circle, pulling it down the back side and then forcing a palm-up finish at the end – is very commonly taught around the U.S. and maybe around the world.
Yet if you look at what elite pitchers do, you won’t find those mechanics being used by ANY of them. In fact, just the opposite, which makes it like learning to ride a bike by facing the back wheel instead of the front one.
Keeley’s well-researched post goes into great detail discussing not only what elite pitchers do by why they do it, and why it makes sense that they do it.
For example, she quotes this article from the U.S. National Library of Medicine which says:
“It has been shown that internal (medial) rotation around the long axis of the humerus is the largest contributor to projectile velocity. This rotation, which occurs in a few milliseconds and can exceed 9,000°/sec , is the fastest motion the human body produces.“
So if an internal rotation motion is the largest contributor to projectile (ball) velocity, why wouldn’t you want to use it? Seems like a no-brainer to me. Yet people still resist.
One of the interesting things about Keeley, along with Gina Furrey who I have mentioned in the past, is that both were taught “hello elbow” mechanics as players, and both now feel that not only did it limit their success, it also contributed to injuries that still plague them to this day.
When they first started out teaching they taught what they’d been taught. But then they did the research and discovered what they were teaching was actually sub-optimal, and they had the guts to change, which isn’t always easy.
Keeley goes as far as to show still photos of famous pitchers who appear to be pulling the hand up in a “hello elbow” manner, but then goes on to show what one of them actually does in a video. I’ve seen the others pitch and can tell you you’ll get similar results if you look at their full pitching motions.
Of course there is more to “hello elbow” than where the hand or elbow wind up. It’s actually a whole series of odd movements that rely on twisting the body, attempting to snap the wrist up at release and some other things that make it difficult to pitch efficiently – or effectively.
If that is what you, your daughter, or your team’s pitchers are being taught, I highly recommend checking out the Key Fundamentals blog where you’ll find a treasure trove of information that busts these myths, taken from the perspective of a former pitcher and practitioner. It’ll certainly open your eyes, and could save you a lifetime of regret.