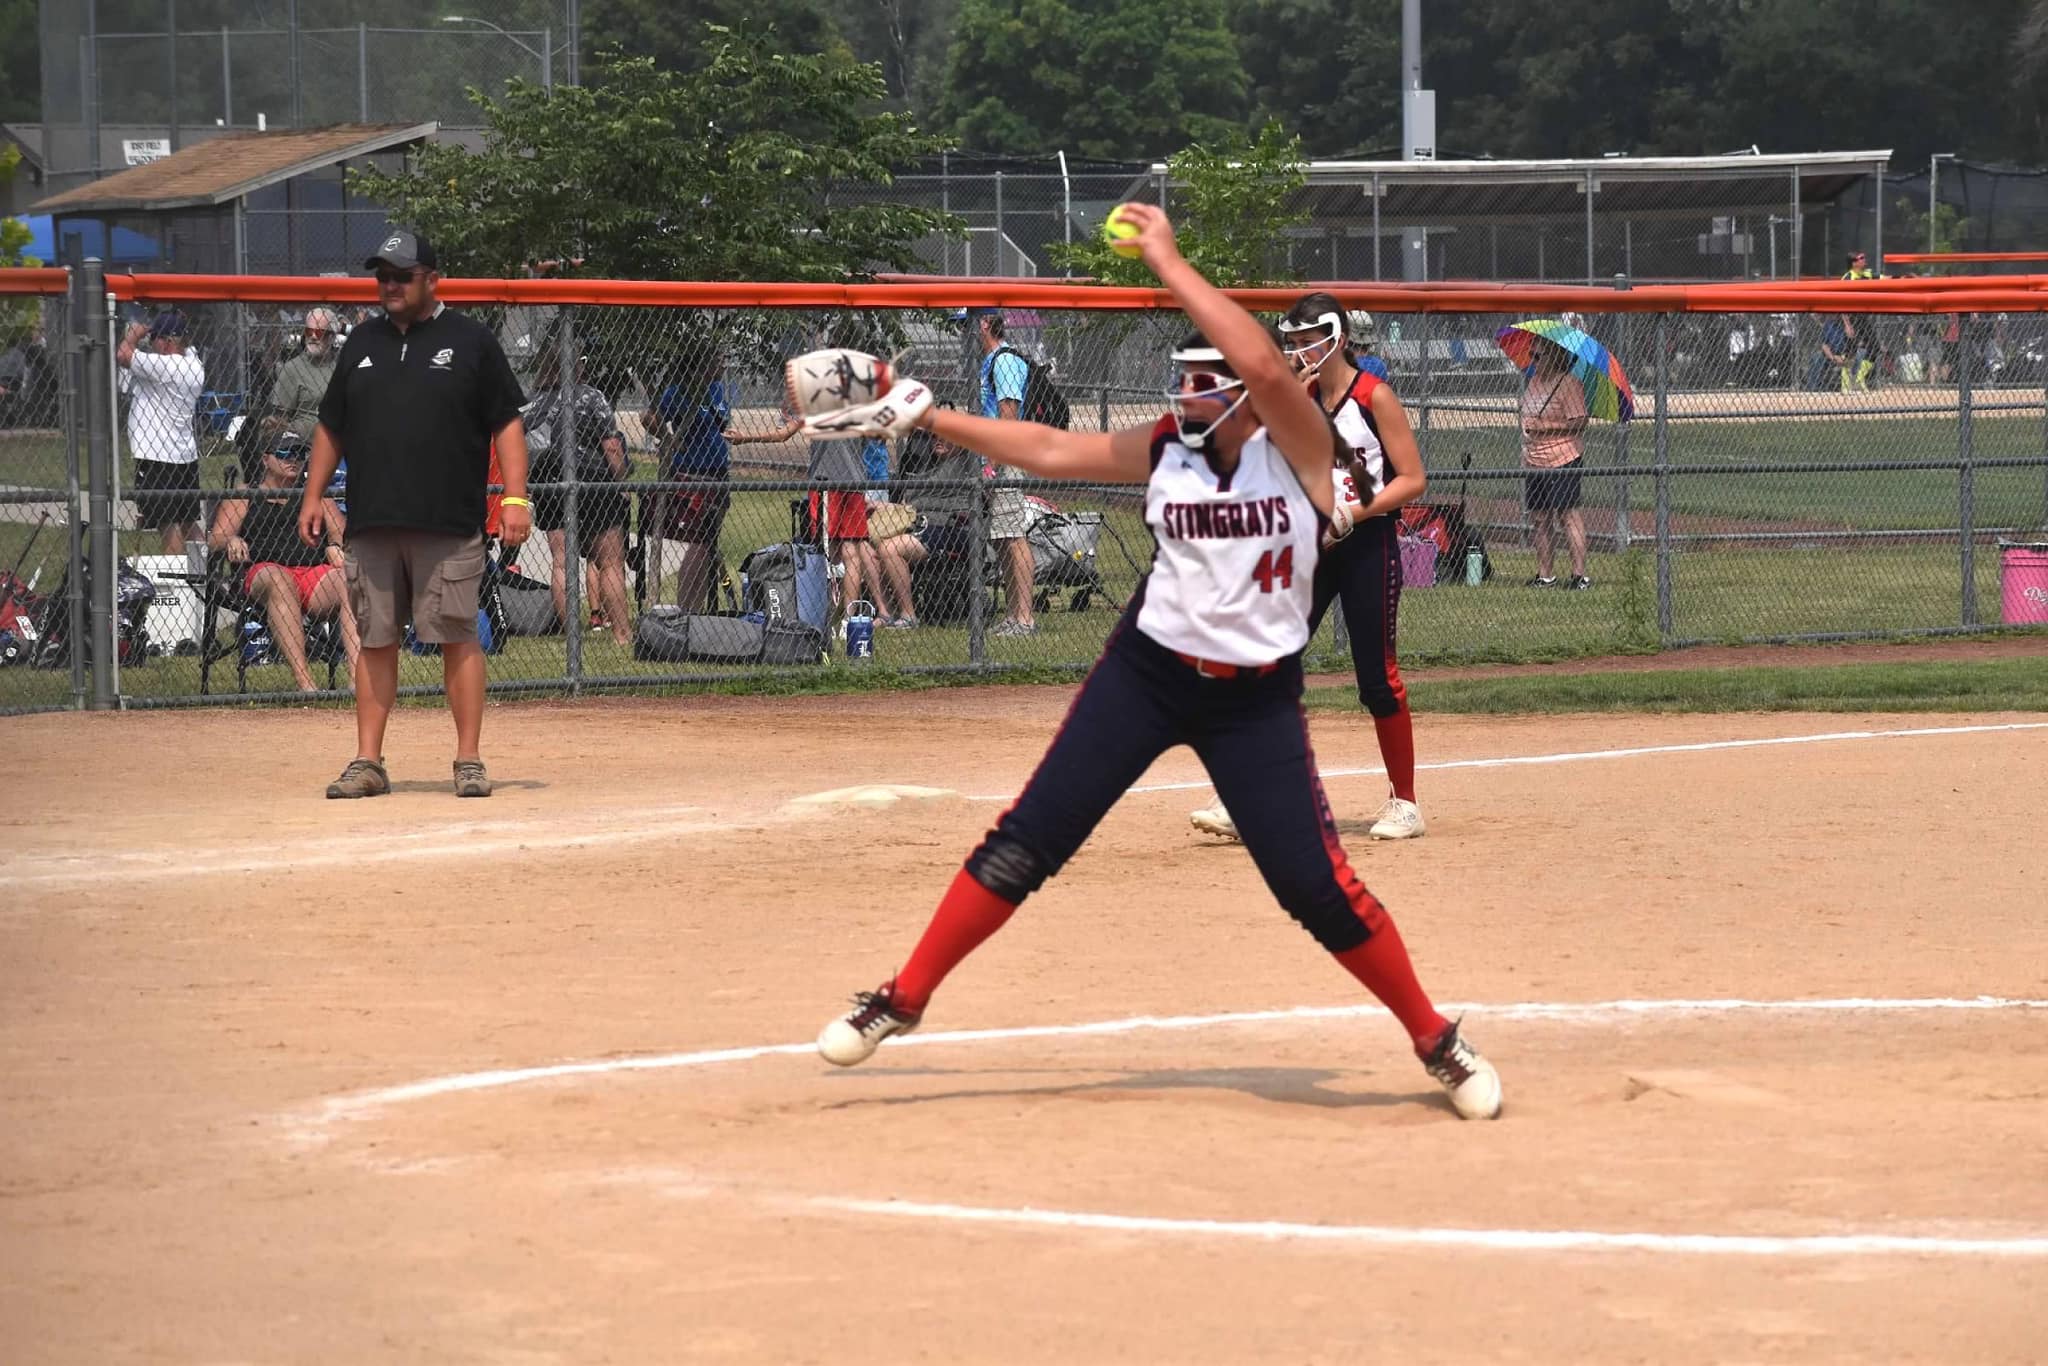
Category Archives: Pitching
Parent Catchers: Please Take a Seat

Let’s get this out of the way right away: I’m not trying to tell you not to catch for your daughters. That time behind the plate as your daughter is learning to pitch is some of the best time you’ll ever spend with her.
No, I’m talking about the position you’re in as you take your place behind the plate. This advice is based on a phenomenon I’ve noticed over the years, but particularly recently, and especially with younger pitchers just learning control.
Parents who catch for their daughters are colloquially referred to as “bucket dads” or “bucket moms” because of their habit of sitting on a bucket to catch. The term is sometimes used self effacingly when giving advice (“I’m just a bucket dad but I think…”) or as a derogatory term (“if we could just get all the bucket moms to keep quiet…”).

But it turns out, that position on the bucket might just be the best thing for pitchers who are struggling with throwing high.
Over the winter I had a few parents who decided not to use the bucket. But rather than squatting down behind the plate (which can be a challenge for some), they decided to just bend at the waist.
I began to notice that those pitchers were tending to throw high. So, I started asking the parents to either sit on a bucket or squat and whaddya know? All of a sudden pitches that were going high started coming in hot in the strike zone instead.
It makes sense. When a parent (or any catcher) is standing up, the target or focal point of the pitcher’s eyes tend to stay up with it. The eyes are critical to throwing at a target (especially the dominant eye), so if the eyes are being drawn upward due to the catcher’s posture the pitcher will tend to throw high – even if the glove is hanging down.

By squatting or sitting, the pitcher’s eyes are drawn into the strike zone, making it easier for her to throw strikes.
If you have a pitcher who can’t quite seem to bring the ball down or hit low locations while you’re standing up, grab a bucket and give this trick a try. It just might help her build better habits that translate into better results in a game.
My good friend Jay Bolden and I have started a new podcast called “From the Coach’s Mouth” where we interview coaches from all areas and levels of fastpitch softball as well as others who may not be fastpitch people but have lots of interesting ideas to contribute.
You can find it here on Spotify, as well as on Apple Podcasts, Pandora, Stitcher, iHeart Radio, or wherever you get your podcasts. If you’re searching, be sure to put the name in quotes, i.e., “From the Coach’s Mouth” so it goes directly to it.
Give it a listen and let us know what you think. And be sure to hit the Like button and subscribe to Life in the Fastpitch Lane for more content like this.
Two Quick Tips to Help with Pitching Accuracy

One of the biggest deterrents to developing quality pitchers for the long haul is emphasizing accuracy over good mechanics in the early years. Yes, it’s tough to watch a young pitcher struggle with control, and it’s really tempting to tell her to just do whatever to get the ball over the plate so she isn’t walking everyone.
But that type of thinking places the emphasis on outcomes instead of the process. And as anyone who has ever taught anyone to be good at anything can you, if you keep your focus on the process the outcomes will take care of themselves.
Still, we’re at the time of the year where accuracy does, in fact, matter a lot. So how do you get your young pitchers to improve their strikes to balls ratio while keeping them focused on the process?
Following are a couple of tricks you can try.
Set up a barrier to block the problem area
This is one of my favorite. In fact, I’ve probably written about it before but it bears repeating here.
Let’s say your pitcher is throwing everything into the dirt in the batter’s box on her throwing side, e.g., a right handed pitcher throwing into the right hand batter’s box consistently.
Set up a hitting screen (or a ball bag or any other solid object) about 20 feet in front of her that allows full access to the plate but nothing more. You want it far enough away that if she hits it the ball won’t bounce right back at her, but close enough that any slight deviations from a good pitch will hit the screen or other object.

Then tell her to throw a pitch without hitting the screen without offering any instruction on how to do it.
At first she may plunk it a few times. She will probably get a little frustrated at first.
But in time (most likely sooner rather than later) her body and her brain will make some tiny adjustments on their own that allow her to get the ball over the plate without putting the object, herself, or her catcher in any danger.
After she does that a couple of times I like to say, “So you can throw the ball over the plate, you just weren’t doing it” or something to that effect as a way of helping them to an “Aha!” moment while keeping it light. But you do you.
Once the pitcher can throw consistently without hitting the screen, remove the screen and let her keep going. I would say 9 times out of 10 she will continue to throw successfully because she has made the adjustments required at a subconscious level.
If she hits one of those 1 out of 10 situations, pull the screen back in and have her work through it again.
I find this method works better than offering external cues such as “step more to your left” or “let go a little later” because the pitcher is able to find what works for her on her own, without a lot of conscious thought. These become internal cues that she can carry with her more easily into a game, and seem to have a more long-lasting effect.
Make sure her dominant/targeting eye can see the target
Each of us has one eye that is more dominant than the other. In ancient days its job was to home in on an enemy or a potential source of food to help the individual with survival.
Today the need isn’t quite so urgent for most of us but the biological reality of it still exists. You can use this fact to your advantage with your pitchers.
You want them to be sure that when they are getting ready to throw the pitch that their dominant eye is hyper-focused on the target. It doesn’t necessarily have to stay there throughout the pitch, but at some point when the brain is making its decision of how to throw the ball you want to use the dominant eye to help the brain understand the target is “here.”
So how do you know which eye is the pitcher’s dominant eye? Here’s a simple method I actually learned when my sons were at a sleepaway camp with the Cub Scouts. The instructors at the BB gun range would check for the dominant/targeting eye to know how the boys should set up to shoot.
Have the pitcher place her hands together in front of her with one overlapping the other to form a small opening in the space between the thumb and first finger on both sides. The opening must be small in order for the rest to work.
Once she has it, have her hold her hands in front of her at arm’s length and look at you through the hole. Whichever eye is looking at you is the dominant eye, I guess because when we can only use one eye we instinctively go to the dominant one.

If the eye is on the glove side there’s very little potential for problems. It will stay in front as the pitcher’s body opens so should have a good view of the target throughout the pitch.
If it’s on the throwing hand side, however, the pitcher will have to take a little more care to make sure that eye can see the target when it’s time to throw since it will be on the back side.
Eventually the pitcher won’t have to look at the target throughout the pitch. Many high-level pitchers look at the ground or the sky as they’re throwing because it helps them do what they need to do, although it’s likely they’ve already set the target with their dominant eye before they even start their motions.
For those who need a little more help, though, reminding the pitcher to use her dominant eye to focus on the target can help her brain and body make the movements that will deliver a better, more accurate pitch.
Keep it natural
Whenever a pitcher struggles to hit her target there will be no lack of suggestions from whoever is around on how to get more accurate. They all mean well, but like the folks who yell “Just throw strikes” as if the pitcher was trying to walk everyone, most of that advice is either unhelpful or can actually stunt that girl’s growth as a pitcher.
Using these two tricks while you’re practicing can help set good habits that carry over into games without interrupting the natural flow of the motion. If you have a pitcher who’s struggling with control, give these ideas a try.
And if you have others, please be sure to share them in the comments.
My good friend Jay Bolden and I have started a new podcast called “From the Coach’s Mouth” where we interview coaches from all areas and levels of fastpitch softball as well as others who may not be fastpitch people but have lots of interesting ideas to contribute.
You can find it here on Spotify, as well as on Apple Podcasts, Pandora, Stitcher, iHeart Radio, or wherever you get your podcasts. If you’re searching, be sure to put the name in quotes, i.e., “From the Coach’s Mouth” so it goes directly to it.
Give it a listen and let us know what you think. And be sure to hit the Like button and subscribe to Life in the Fastpitch Lane for more content like this.
A Quick Primer on Fastpitch Pitching Rules
When you go to a game it often seems there are two kinds of people when it comes to the rules of fastpitch softball in general. One group feels like they know absolutely nothing and are often confused about why umpires made the call they made.
The other group is absolutely certain that they know everything there is to know about the rules and that, like the royalty, their word is sacred and indisputable. This post is for both of them.

It was actually spurred by a note from an old coaching friend who told me that after 10 years out of the game he is coming back to coach an 8U team and wanted to be sure he’s up-to-date on the latest pitching rules. Kudos, Ted, on looking before you leap.
We’re not going to get into the entire Rule 6 from the USA Softball rulebook, which covers everything. Instead, we’re going to focus on some of the recent changes as well as misconceptions that even some umpires may have.
Here we go.
Starting position (aka Start Back Rule)
Back in the old days of fastpitch, female pitchers were required to start with both feet in contact with the pitching rubber. That is no longer the case.
Pitchers must start with the foot on the throwing hand side (often referred to as the “pivot foot” or “drive foot”) in contact with the pitching rubber. That doesn’t mean it has to be sitting squarely on it; a heel barely in contact with the rubber is still considered to be in contact both by the rules of softball and the rules of physics.
But the other foot, popularly referred to as the “stride foot,” can be anywhere the pitcher wants as long as it is behind the rubber and within the 24 inch width of the rubber. That said, pitchers need to be careful about how far they set it.
Some will take this ability to the extreme, placing it far back even though it’s not right for them (although that placement can be correct for others). The easy way to figure out a good starting point is to step on the rubber and place your feet like you’re going to steal a base or run a race. Then make any minor adjustments from there.
Step Back Rule
Here’s a quick quiz: once pitchers place their feet and go into their motion are they allowed to take a step further back with the stride foot? The answer is it depends which rules body they are playing under.
A step back IS allowed under National Federation of High School (NFHS), USSSA Softball, Little League, National Softball Association (NSA, but Great Lakes Region only) and often many local rec leagues that are not affiliated with any national organization. If you are playing under a sanctioning body not listed here you may want to check their rulebook to see what is permissible.
A step back IS NOT allowed under USA Softball, PGF, Alliance Fastpitch, and some other organizations (check your local listings). If the pitcher steps back to begin the pitching motion an illegal pitch will be called.
So what does this mean for your pitchers? I teach my students to use a “start back” rather than “step back” technique. “Start back” is legal everywhere, so there are no issues with it.
On the other hand, if your pitcher is used to stepping back and then gets called for it when you play somewhere it’s not allowed, it’s totally going to mess her up for the rest of the game. She will be thinking about not stepping back instead of throwing the pitch, and even if she can block that out it will mess up her rhythm and her timing, resulting in a lot more balls and meatballs than you’re used to seeing.
Have her learn the “start back” and you’ll both be a lot better off.
Leaping (two feet in the air)
This is a fairly recent change. If you’ve been away for a while you remember when fastpitch pitchers were required to drag their pivot away from the rubber; if it came off the ground it was technically an illegal pitch, although this rule violation was rarely called for the most part. At least until you got into an important game and your pitcher was doing it.
This rule was changed a few year ago. Now it’s ok if the pivot leaves the ground and both feet are in the air. I don’t know this for sure but I have little doubt the change was made to eliminate coaches and parents from complaining constantly about an opposing pitcher their players couldn’t hit off of.
It was designed to get rid of all the ticky-tacky chirping when a pitcher’s foot was off the ground by a few inches so the kids can play the game. A good thing by my estimation, as I talked about here.
Of course, you know the story of “give a mouse a cookie.” Rather than simply being grateful that a minor irritation has been removed, some folks have decided to try to take advantage of the new rule by teaching their pitchers to leap like Johnny Lawrence in Cobra Kai.

The problem here is that when you leap that way you’re most likely to land on the foot you pushed from originally, particularly if you plan to maintain front side resistance when you land. If you push again, that’s a crow hop – which is still illegal.
Those who are teaching it claim there is no second push, they’re just landing on it. Either way, now an umpire once again has to watch closely to determine if a rule is being violated – the very thing the original rule was designed to eliminate.
That leaves us with a dilemma. Either the various governing bodies need to crack down on anything they even suspect is a crow hop or they need to eliminate the rule entirely so umpires can focus on the actual game action again. We’ll see what happens going forward.
The hands when taking your position on the rubber
Sometimes in their enthusiasm to throw a pitch young pitchers will develop a habit of stepping on the rubber with their hands together. This is illegal everywhere.
When a pitcher steps on the rubber she needs to have her hands separated. The ball can only be in one hand.
What some umpires don’t seem to understand is that it doesn’t have to be in the throwing hand. It can be in either hand when she steps on the rubber.
Unfortunately if you come across one of those rare folks in blue who don’t know the proper rule there isn’t a whole lot you can do about it. Bringing out the rulebook to prove you’re right is a big no-no.
Basically have your pitcher put the ball in her throwing hand to step on and get through the game. And secretly roll your eyes until next game.
Presenting the ball
I’m not quite sure what “presenting the ball” actually means, but whatever it’s supposed to be let me assure you there is no such rule. Case closed.
Moving the pivot foot prior to the pitch
While some people interpret the rule about keeping the “pivot foot” on the pitching rubber prior to the pitch as meaning it can’t move once it’s in place, that’s not true.
USA Softball rules (which all other rule sets are based on) specifically state the pitcher can slide her foot along the pitching rubber as long as said foot remains in contact with it. That also goes for other little wiggles or motions, including rocking back onto the heel – again, as long as contact is maintained.
What you do have to watch out for is the pitcher lifting her foot off the rubber (even slightly), or stepping forward off it (aka a “gym step”). In the case of the former it’s best to learn not to lift off, but there’s no need to go crazy if it’s coming up a little.
That’s really hard to spot from behind the plate or even from behind first base unless it’s egregious, and even then the umpire has to be inclined to watch for it and call it if he/she sees it. Most of them have more important things to do on the field than watch for that.
Read it, know it, live it
There are plenty of other rules in the rulebook, but these are probably the key ones every coach, parent, and player should know. That said, if you’re a coach playing in leagues or tournaments it behooves you to know ALL the rules, including any specialty rules that are specific to a particular tournament, so you can make sure your pitchers are prepared to succeed.
My good friend Jay Bolden and I have started a new podcast called “From the Coach’s Mouth” where we interview coaches from all areas and levels of fastpitch softball as well as others who may not be fastpitch people but have lots of interesting ideas to contribute.
You can find it here on Spotify, as well as on Apple Podcasts, Pandora, Stitcher, iHeart Radio, or wherever you get your podcasts. If you’re searching, be sure to put the name in quotes, i.e., “From the Coach’s Mouth” so it goes directly to it.
Give it a listen and let us know what you think. And be sure to hit the Like button and subscribe to Life in the Fastpitch Lane for more content like this.

Energy Creation: The Rolling Snowballs Corollary

This seems like an apt analogy since as I write this much of the USA is still dealing with a fair amount of snow, including many places that rarely get any. Welcome to my world, although we actually haven’t gotten much all winter.
Anyway, the other day I was trying to explain the concept of acceleration to a young pitcher. We were talking about the need for her arm to pick up speed down the back side of the circle instead of staying at one speed if she wants to throw harder.
Then an idea hit me, thanks to a childhood misspent watching Saturday morning cartoons.
“Think about a snowball rolling down a hill,” I said. “At first, the snowball is small. But as it rolls down the hill, the snowball starts picking up more snow, getting bigger and bigger. Then, when the snowball reaches the bottom and stops, the snow explodes all over the place!
“That’s what needs to happen with your pitching arm,” I continued. “As you come down the back side you start moving your arm faster, which gathers more energy like the snowball gathers snow, until the ball explodes out of your hand at the end.”

That made perfect sense to her. The more the snowball moves downhill the faster it goes and the more snow (energy) it picks up.
Ergo (love that word, rarely get to use it in a sentence), getting that arm to move faster down the back side of the circle is critical to maximizing speed. Logical, right?
But that doesn’t mean pitchers can always do it. Some will do it naturally. Others will do it once your bring it up. But some have to unlearn old movement patterns and replace them with new ones before they can execute it.
One of the best ways to help them learn that acceleration is by moving the pitcher in close to a net or tarp, having her stand with her feet and body at 45 degrees to the target, and then throwing with a full circle, emphasizing the speed on the back side of the circle. You can also do that with six or eight ounce plyo balls into a wall.
I also prefer they move their feet as they do it since body timing is also crucial to great execution.
The key here is feeling the arm moving as quickly as it can. But there’s another caveat.
To really make this work and get the acceleration, the arm has to be loose and the humerus (upper arm) has to be leading with the forearm trailing behind, i.e., throwing with whip. Moving the whole arm in one piece, as you do when you point the ball toward second base and push it down the circle, will not yield the same level of results. In fact, it could cause injuries.
Once the pitcher can execute this movement from in-close, start moving her further away and trying it again. Take your time with this process, because if you move her back too fast and she perceives the target is too far away she will start muscling it to make sure it gets there rather than letting it move naturally.
At each step, take a video and look to make sure there is at least somewhat of a bend or hook at the elbow instead of a straight arm. If not, move her back up or slow her down temporarily so she can get the proper mechanics.
Then speed it up and try again.
By the way, the energy snowball concept is not just for pitchers. This type of acceleration into release or contact is also critical for overhand throwing and hitting.
Or pretty much any other athletic skill requiring power.
Now, if you’re an adult with lots of real-world experience, all of this may seem obvious to you. You may even be wondering why I’m spending so much time on it.

But a young player, or even a young adult player, may not have the real-world understanding of basic physics or biomechanics to tie acceleration into energy production. For them, it’s helpful to put it in a context that they can easily comprehend based on what they have already seen.
Even if it comes from a Saturday morning cartoon.
If you have a player who’s struggling to understand the concept of acceleration into action, try talking about the rolling snowball. It just might break the ice with them.
My good friend Jay Bolden and I have started a new podcast called “From the Coach’s Mouth” where we interview coaches from all areas and levels of fastpitch softball as well as others who may not be fastpitch people but have lots of interesting ideas to contribute.
You can find it here on Spotify, as well as on Apple Podcasts, Pandora, Stitcher, iHeart Radio, or wherever you get your podcasts. If you’re searching, be sure to put the name in quotes, i.e., “From the Coach’s Mouth” so it goes directly to it.
Give it a listen and let us know what you think. And be sure to hit the Like button and subscribe to Life in the Fastpitch Lane for more content like this. Commercial over.
Snow roller photo by Perduejn, CC BY-SA 4.0 https://creativecommons.org/licenses/by-sa/4.0, via Wikimedia Commons
Vlog: Absolutes v Core Principles in Fastpitch Pitching

Today we’re starting the new year with something a little different.
Recently Rick Pauly of Pauly Girl Fastpitch and the High Performance Pitching certification program and I got together for a video discussion about several topics related to fastpitch pitching. The driving topic behind it was the difference between absolutes and core principles in athletic movement generally, and how we view each relative to fastpitch pitching.
The discussion then branched out to a few other related topics, including the importance of posture, the effect of motor preferences when determining what’s optimal for performance, and the often-overlooked significance of deceleration as part of the overall kinetic chain.

So what are absolutes v core principles? We go into it more in detail in the video but briefly it’s the idea of whether there’s one “correct” way to do things – basically a hard line – or if there is a more of a range into which good pitching mechanics can fall.
In other words, do you want your pitchers doing certain things exactly the same way or does fastpitch pitching allow more room for deviation based on a number of factors? And even within that are there exceptions, i.e., pitchers who don’t necessarily do things the way they “should” but are successful anyway?
Which ultimately leads to when do you make corrections/changes and when do you just let them do what they do?
I think you’ll find it to be a pretty interesting discussion that covers a lot of ground. To check it out, follow this link to the Pauly Girl Fastpitch blog.

Happy new year to all! Or happy whatever holiday is close if you’re reading this sometime in the future.
Weather Outside Frightful? You Can Still Practice Part 1

In my part of the world we are currently at the time of year when the weather outside is, as the song says, frightful. Cold, snow, high winds, icy ground, and more make going from the house to the car, much less trying to pitch, hit, field, etc., a rather unpleasant experience.
In other parts of the world you may be facing monsoons, or at least a rainy season that has turned everything to mud, dust/sand storms that make it hard to see your glove in front of your face (if that’s your idea of a good time), or other weather phenomena that make outdoor practice time a no-go fo a while.
Sure, you can go to an indoor facility where it’s warm (or semi-warm at least) dry, and reasonably well-lit. But that means there has to be one available in your area, paying a fee (which not all can afford), and having transportation to it – none of which is a given.

So does that mean you have an excuse to skip practicing entirely until the days start getting warmer/drier/less frightful and spend all your time watching Tik Tok videos or sending Snaps between your friends or whatever it is you spend your free time on? I’m not judging.

No, it doesn’t mean that at all. Hate to break it to you but there are plenty of ways to practice that don’t require a facility, or even fastpitch softball equipment.
A lot of these activities actually help break down the skills and let you focus on areas in which you’re weak. You know the kind of things you hate doing when you drag your way all the way to a training facility where you’re paying good money for cage time.
But think of it this way: if you put in the time now to work on these details, you’ll be that much further ahead when it’s time to take the field next spring.
Over the next few weeks we’ll look at options for at-home practice broken down by position or skills. Today, we’re starting with…
Pitching
- Brush contact and wrist pronation– If you’ve been paying attention at all you know you need brush contact that creates pronation (inward turning) of the wrist, not a forced upward wrist snap, to deliver the highest level of energy into the ball in order to maximize speed. But if you were taught to do wrist snap drills, either standing three feet in front of a cager and forcibly snapping or kneeling on one knee in front of a catcher or wall, putting your arm behind the other leg snapping from there, you know how hard it can be to retrain yourself to pronate. Here’s where a rolled-up pair of socks is your friend. Put those socks in your throwing hand, pull your lower arm back a bit while turning the palm of your hand outward, then let your hand and forearm come forward rapidly, brushing lightly against your hip while allowing (not forcing) your hand and wrist to turn inward. Do it over and over until it feels natural, then move further up the back side of the circle, and keep working your way back until you can make a full circle. The nice thing here is you can throw the socks into any wall in the house, or even a mirror, without doing any damage.
- Leg drive force – This is another thing that almost every pitcher can use more of. Yet most don’t focus on it as much as they should. But it’s another thing you can do at home. All you need is about 8-10 feet of space and a floor where you won’t slip, such as a concrete floor in a basement or garage or even a rec center. Take all the leg drive drills your coach has given you and do them without throwing. You can start by not using a throwing motion at all, then add a motion (but no ball) to it. Then take your rolled-up pair of socks and add them into the mix too. Keep working on maximizing how you’re using your legs, and how you’re stopping yourself, until you feel like you’re flying rapidly and weightlessly forward then stopping suddenly. Focus more on speed of movement than distance.
- Leg drive timing – One of the most important checkpoints for pitching speed is what happens with your drive foot when your arms are at 3:00, i.e., straight out in front of you. It should be detaching from the pitching rubber at that time. If it’s not, home-based practice is the perfect time to work on it. I recommend setting up your phone to record video so you can see if you’re getting off the rubber on time, because if you could feel it you’d already be doing it. Usually this problem occurs when you lead with your hands/arms instead of your legs/hips. So to address it, put your hands/arms behind your back and work on driving out with just your legs. Do that hundreds of times to get the feel of starting with your legs/hips, then slowly start adding your arms back in, stopping at 3:00 first, then 12:00, then all the way around. Check the video to make sure you’re doing it correctly and don’t move on until you can nail it every time at that point. Finally, add in the socks to make sure you can maintain the timing while actually throwing.
- Elbow bend – I know some of you were actually taught to make your arm long and straight, and then push the ball palm-down on the back side of the circle. But that’s not the way high-level pitchers pitch – even those who were taught (or teach others) to do it that way. Instead, you need to keep the ball facing either upward or slightly out to the side, and get some bend (flexion) in your elbow so that when you come into the release zone you can whip the forearm past the upper arm (humerus) in a series of decelerations and accelerations. It is one of the toughest corrections to make, but f you can’t do it you’ll never maximize your speed. To relearn this movement start by placing the little finger-side edge of your hand against a wall and then move around the circle keeping that edge against the wall until your forearm is forced to pronate naturally near the bottom of the circle. Rinse and repeat, being sure to keep your arm relaxed. Then move away from the wall, stand with your feet at 45 degrees to your “target” and take something that weighs around 16 oz. (a plyo ball is preferred but a can of green beans works too) and SLOWLY move your arm around the circle, paying attention to whether you can feel the bend. Be sure to keep your shoulders from moving forward as you start to pull the ball (or green beans) down the back side of the circle. Check yourself with video. The OnForm app can be helpful here, because ir will actually measure how much elbow bend you’re getting. It should be roughly 20-30 degrees as you get to about 8:00, although your results may vary depending on your motor preferences. Then get rid of the weight and use a faster throwing motion. Finally, start throwing the socks and again check with video to see if you’re maintaining the bend. If not, go back to the last step where you COULD keep the bend and work more from there before trying it again.
- Spins – For this one you’ll need a little more room and a foam ball. A regular Jugs Lite Flite softball will work for pretty much anything. An EZ Riseball is a great choice for the rise or curve. And no, I’m not getting any promotional consideration for either. Take your choice of ball and work up-close into a net or a tarp. You may want to mark the seams of the Lite Flite with a Sharpie marker to make it easier to see the spin direction or spin axis (whichever you prefer). Spending time on the spins at home will save you time during lessons or practice later, and will help ensure you’re getting the movement you’re looking for when it’s time to pitch to live hitters.
So there you go – 5 ideas of what to do to either correct pitching issues or enhance pitching performance. Next week we look at what hitters can do in the same situation.
Snowstorm photo by Jeffrey Czum on Pexels.com
How “Garbage Time” Can Become Your Treasure

There is an old saying that states “One person’s trash is another person’s treasure.” (Actually it says “one man’s” but I have updated it for the modern era. You’re welcome.)
This concept definitely applies to softball, especially if you are one of those players who is struggling to get playing time at a particular position so you can prove what you can do. It all revolves around what football fans call “garbage time.”
The term “garbage time” typically refers to a point in the fourth quarter where one time is so far ahead the other team has no chance to catch up, but there are still several minutes left to play. That’s usually where you will see the second string quarterback (as well as other bench players) take the field to run out the clock while keeping the starters from suffering a stupid injury.
The softball equivalent would be a game where one team is clearly over-matched, down by several runs, and there is a time limit. It’s clear the team that’s down isn’t going to be able to overcome the deficit in time but they have to keep playing anyway.
Here’s how you can turn this unfortunate situation into an opportunity.
Let’s say you’re the third or fourth pitcher on your team. You started the fall season kind of rough but have been working hard over the offseason and have improved your pitching considerably over the last few months.
Now that it’s summer you’re eager to prove what you can do, but your coach still thinks of you as you were back in the fall and is reluctant to put you in to pitch.
So suggest to your coach that you will take all the “garbage time” innings you can get. (Although you may not want to refer to them as “garbage time.”)
Frame in the context of helping the team: The team still has to play, but why waste one of the “good” pitchers on meaningless innings? Wouldn’t it be better to save them for a game where you have a better chance of winning?
That logic should make sense to most coaches – at least the ones who are honest with themselves. Worst case you go out there and give up a bunch of runs and the game ends early due to the run-ahead rule.
Embarrassing, sure, but does it really matter if you lose by 7 runs or 10 runs? And if you do get run ruled your team gets a little extra time to rest, relax, and reset before having to play their next game.
But you’re not actually planning to give up any runs. In fact, your plan is to show the coach that you’re ready to pitch by holding your own against a team that was beating up on your #1 or #2 pitcher.

Do that a couple of times and your coach may start to look at you differently. Perhaps he/she will let you start or relieve in a pool play or “friendly” game where the outcome isn’t already decided.
Do well there and he/she may start giving you more opportunities, and eventually turn to you as a regular member of the staff instead of the pitcher of last resort.
All because you volunteered to eat up the innings no one else really wanted.
While this strategy probably works best for pitchers, it can be applied to other positions as well. After all, field players need a break from time to time too, especially if they’re already nursing injuries or you’ve been playing a lot of games either in one day or on back-to-back days.
And who knows? Maybe your eagerness and positive attitude can spur the team to keep fighting and do better even when it feels like all hope is lost.
In the right conditions it just takes one spark to light a major fire. You could be that spark.
It’s said that luck doesn’t just happen; we make our own luck. Volunteering for “garbage time” is a way to make your own luck – and turn what looks like trash into your own personal treasure.
Gold bars photo by Pixabay on Pexels.com
Helping Pitchers Transition from 10U to 12U
Ask just about anyone who has gone through the full softball journey and they will probably tell you that the toughest transition is going from playing 10U to 12U (or 11U for those who like to talk in one-year increments). While it is challenging for all players, with new rules to keep in mind, greater disparities in size and strength due to the puberty fairy touching some earlier than others, and a generally higher level of play and expectations, nowhere is it harder than on pitchers.

The reason, of course, is two key rule changes that can have a huge effect on pitcher success: 1) the size of the ball increasing from an 11 inch circumference and roughly 5.5 oz weight to a 12 inch circumference and roughly 6.5 oz weight, and 2) moving the pitching rubber back from 35 to 40 feet.
Either of those changes would a challenge on their own for reasons we are about to go over. Having them occur together can be downright daunting, especially for the size-challenged.
Let’s take the size of the ball first, since that was the order I listed them above. Have to be organized when you’re a coach, after all.
Increasing the size of the ball by an inch or an ounce doesn’t sound like much to an adult. But it can be tough on girls who already felt like the 11 inch ball was filling up their hands.
If you’d like to get a feel for what it’s like, find one of those 14 inch softballs they sell as a training aid and try pitching or even throwing it overhand. Feel how insecure it is in your hand for a while, how it kind of slips out instead of getting propelled out.
Now imagine trying to throw that to an actual hitter in a game, where a couple of weeks ago you were throwing a smaller ball. Scary, isn’t it?
Then there’s the pitching rubber moving back five feet. Again, it may not seem like much to an adult, but to someone who is still 10 or recently turned 11 it looks like a long distance.
Suddenly all the old mechanics break down as pitchers try to push the ball more to make sure it gets there (even though they really don’t need to). That extra distance also gives hitters more time to see the ball and react, so even if the pitcher is able to maintain her previous speed during this transition time (which often doesn’t happen) the hitter perceives the ball as being slower, making it easier to hit.
And suddenly, that pitcher who was dominating in 10U is getting beat up in 12U. Discouraging, to say the least.
It can take a while before those newly minted 12U pitchers get used to all these changes and start feeling confident again. But there are a couple of proven strategies to shortcut the process.
Strategy #1: Just hold a ball
This is going to seem so simple you’re going to wonder why you didn’t think of it, or wonder if it will work. But trust me it does.
The bigger ball will feel strange in your pitcher’s hand, especially if she already has small hands. As a result, the fear of having it slip out could cause her to cup her wrist as she makes her arm circle, pretty much killing general arm speed and whip at release. So…
Have her hold a 12 inch ball whenever she can – while she’s standing around at practice, while she’s reading or watching TV at home, while she’s riding in the car, etc. Familiarity will breed comfort.
Within a couple of weeks the larger ball will feel normal to her and she won’t think about it much. And if she goes back and picks up an 11 inch ball she’ll marvel at how small and weird it feels.
Strategy #2: Pitch from short distance
Actually this applies to overhand throwing too, but we’re focused on pitchers today so we’ll describe it as such.
Basically, have your pitcher get in close to a net, screen, tarp, etc., and throw from the K position, full circle while facing in 45 degrees, and even a full windup/pitch. Basically, take distance out of the equation as she gets used to the feel of the ball in her hand while pitching.
Let her feel that she can go full-out into the pitch without the need to cup her wrist or do anything else to keep the ball in her hand. The more comfortable she gets, the more she’ll relax and quit over-thinking it.
Strategy #3: Do long toss
This may seem like a contradiction with the last strategy but it’s really not. Instead, the two work hand-in-hand so to speak.
The previous strategy was part of getting comfortable with the size of the ball. This one is about getting comfortable with the new, longer distance.
As mentioned earlier, when pitchers see the new distance they can get intimidated and feel like they have to force the ball out more. But as soon as you start pulling them back you start to take the arm by itself out of the equation and let them feel more of how the whole body contributes.
The ultimate goal, of course, is when they’re finished and you bring them back up to the rubber, suddenly 40 feet doesn’t look so far away. I highly recommend doing this outdoors so you’re not limited on how far back your pitcher can go.
To do this type of long toss, draw a line in the dirt a few feet behind the pitching rubber and have her throw from there with a full windup. If she makes it on a fly (as she almost certainly will) move back five or six feet and do it again.
Rinse and repeat until she just can’t get it there anymore. Then pull her back to the rubber and watch her amazement at how close 40 feet suddenly looks.
Pro tip: To help pitchers get back further than they otherwise might, as soon as they start to struggle tell them to get more air under the ball, or try to throw it over the backstop instead of to the catcher.
This exercise will not only help with the psychological side of moving to a new distance. Performed regularly it will help pitchers increase their speed by increasing strength and general effort into the pitch.
Easing the way
Although some pitchers can make the transition from 10U to 12U without trouble, most will have some issues at one point or another. Jumping on these strategies early can help speed the process along and prepare your pitcher(s) to continue to have success going forward.
12 Ways Fastpitch Softball Has Changed Over the Last 25 Years

It is always tempting to think that the way things are today is the way they have always been. After all, it can be difficult to imagine things being significantly different if you’ve never known anything else.
Well, I’m here to tell you that the game HAS changed significantly over the last (roughly) 25 years since I became involved with it. Sometimes for the better, sometimes for the worse, and sometimes somewhere in between, depending on your point of view.
So for those of you who enjoy a little history, or who wonder if things were better in the “good old days,” or would just like a little perspective on how we got to where we are today, here are X ways the game has changed over the last 25 or so years.
#1 – The Increase in Offense
If you look back at scorebooks, especially at the higher levels of play such as D1 college games, you would find a lot of games ended with a score of 1-0 or 2-1. You would probably also find that many of those games went into 8, 10, 12 or more innings to arrive at that finaly score.
There were a lot of reasons for that phenomenon, some of which we’re going to get into below. But regardless of the reasons, there typically wasn’t a whole lot of offense being produced back then.
Hits were a rarity – never mind the powerhouse slugfests we typically see today. Many of the “old school” types who played or coached in that era believe that’s when the game was at its best.
But the reality is unless you were a pitcher or a pitcher’s parents those games were kind of boring to watch, especially for the casual fan. So much so that on those rare occasions when ESPN would televise a game they would typically tape it, run it later, and edit out two or three innings where there were no hits or runs scored because they figured nothing happened so viewers weren’t missing anything.

That’s why many of the changes that follow were made – to make the game more accessible and interesting to the casual viewer so they could hike up ratings and capture those big TV dollars. Turns out that strategy was the right one because the 2024 Womens College World Series final games averaged 2 million viewers per game, and softball at all levels is more visible than ever on TV.
#2 – The Ball
This was one of the big changes made to try to increase offense.
The original ball for fastpitch softball was white with white seams. As a result, hitters would tend to see a screaming blur of white coming at them from a close distance, making it difficult to pick up on how the ball was spinning (which might give them a clue as to what it was going to do).
Today, of course, it is optic yellow with red seams. That makes it at least a little easier for hitters to pick up and follow to the plate overall, and gives them at least a shot at identifying the type of pitch being thrown so they can react accordingly.
That said, with all the bullet spin pitches being thrown these days picking up the seam direction is probably less important. Still, when facing pitchers who do have true spin on their balls it can help.
#3 – Pitching Distance
This was probably one of the biggest changes that helped the offense. Believe it or not, when I first became involved with the sport, the pitching distances were 35 feet up through 12U, and then 40 feet from 14U up.
That’s right – the college and international pitching distance was 40 feet!
Today, of course, only 11 and 12 year olds pitch from 40 feet. The extra three feet has helped older hitters gain a little more time to see the ball and execute their swings, resulting in more offense.
With so many more pitchers throwing at or near 70 mph, however, don’t be surprised if you start seeing a movement to push the pitching rubber back a little more in the near future.
#4 – More Offseason Training for Hitters
Today it’s almost a given that fastpitch softball players will go for hitting lessons pretty much year-round. That wasn’t always the case, though.
In fact, many players rarely picked up a bat when they weren’t in-season, or at least in the pre-season. Contrast that with pitchers training constantly in the offseason and you can see another reason why there was such an imbalance.
Today it’s pretty common to see players from 10 years old up either taking lessons or showing up to work on their swings in batting cages two or three times per week. They may not always have the greatest swings, but sheer repetition has helped them out-perform many of the players in the past.
#5 – The Proliferation of Facilities
The increase in the number of players who want to work out in the offseason has led to the growth of batting/pitching cage facilities throughout the U.S.
Back when my oldest daughter started playing you had to travel pretty far to find a space where you could pitch or hit in the offseason. And I live in a pretty high popular suburban area.
Today you can hardly swing a dead cat without hitting a high-quality facility that offers not only cage space but also a weight training area, speed and agility classes, and a host of other options to help youth players develop their games. Sure beats trying to sneak into the local high school so you can get a few reps in.
#6 – More Instruction
When my oldest daughter announced she wanted to start pitching I had no idea of what to do to help her. I felt lucky to come across a coach from another team who gave pitching lessons, and would drive an hour to take her to those lessons either at a field in the summer or in a middle school gym in the winter.
This was pre-Internet, by the way, so it’s not like I could have done a Google search to find someone. It was all pretty much word of mouth.

It’s not too hard to find an instructor today. They are in every local facility, and most can be found through social media or a quick search on “fastpitch pitching instruction near me.”
Now, that’s good and bad. Good because you can find them, but bad because it allows a lot of unqualified people to hang out a shingle and take your money while leading you down a rabbit hole.
Still, with a little due diligence you can find someone who can help your daughter develop faster than she would through the trial-and-error method on her own. Which is a good thing.
#7 – The Uniforms
Now we get to some of the fun stuff.
When my oldest daughter started playing, college teams and international teams wore shorts. So naturally all of the youth players wore or wanted to wear shorts too.
In fact, the travel program my daughter was in had pants and I had to fight on their behalf to get the standard changed to shorts.
Then college teams started going to pants, largely driven by Arizona who was a powerhouse at that time. And then everyone else went back to pants.
There is that saying that what goes around comes around, so I can’t help but wonder if one day shorts will make a comeback. I’m sure all the manufacturers who sold those calf-length sliding pads are hoping that’s the case.
The other significant change in uniforms is how many today’s players often have. Back in the day it was normal to have two, which meant if you had a three- or four-day tournament someone was going to be doing laundry at home or in the hotel.
Today, of course, teams can have four or five uniforms, plus maybe a specialty one for a cause, plus practice uniforms. The players of the past are likely pretty jealous of all the options today’s players have.
#8 – Time Limits
This may be hard for today’s players and parents to believe, but once upon a time EVERY game went a minimum of seven innings. Longer if there was a tie at the end of seven, because in fastpitch softball games could not end in a tie.
Nowadays it’s common in travel ball tournaments for there to be an 1:15 time limit. Sometimes that means no new inning, other times it’s that the game stops at 1:15 and if the inning isn’t over you revert back to the previous inning.
The addition of a time limit definitely makes it a different game. It’s critical for your team to start fast on offense and not make too many errors on defense early on, because you may not have the time to make up for any issues later.
It’s also a challenge for coaches who want to give all of their players ample playing time. One rough inning and those kids who started on the bench may not see the field. Or else the coach will have to put in subs in the middle of an inning, which usually doesn’t make anyone happy.
Time limits have also had a lot of other effects on the game. You can read more about my thoughts on this big topic here and here.
#9 – Offseason Training
For much of my early coaching career it was rare for teams in areas where there was a lot of cold and snow to do any practicing during the offseason. Dedicated facilities were rare, and local schools often didn’t like to rent out there gyms to outside programs so they’d charge an arm and a leg and then make it difficult to schedule times.
The program I was with was a rare exception. We worked out a deal with the local Park District to offer “open clinics” on Saturday mornings, which would give us an hour a week to work with our teams, plus any other players in the area who wanted to sign up. We’d actually draw a pretty good cross-section of dedicated players from various teams, essentially training our competitors.
Today it’s not uncommon for teams to practice two or three times a week in dedicated baseball/softball facilities, either their own or facilities they rent. It shows up in the way they play, which quite honestly is far better overall than many of the teams of yesteryear.
#10 – Winter Games
Readers in California, Florida, Arizona, and other southern states will have no idea what I’m talking about, but for those of us in cold weather states the addition of games and tournaments during the winter has been a huge change.
There are more domes and other large turf facilities than ever, which opens up the ability for teams to play two or three times a month if they choose. While I still believe there is more value to practice than games in terms of learning the sport, I will also admit that practicing all the time without any games to measure your progress can be boring.
Having the ability to mix games in with offseason practice has been a huge plus for today’s players.
#11 – The Technology
This has been a huge advance for today’s players over those in the past. Let’s start with bats.
Back in the day if you had a Louisville Burgundy bat (old timers, you know the one) you were highly privileged. Today most players wouldn’t use that for a practice bat.
Bat technology has advanced so much that now even a checked swing can result in a double if you hit a gap. One more reason scores now are more like 7-5 instead of 1-0.
But there is also technology like 4D Motion, Rapsodo, Blast, Pocket Radar and others than can deliver hard data instead of just having coaches eyeball a pitch or a swing and guess what’s going on. Not to mention high-speed video such as OnForm that lets you slow down the skill, mark it up, and really analyzed it to the Nth degree.
Finally, there is game scoring technology such as GameChanger that not only lets family and friends who can’t attend the game follow along (or see how their favorite players did afterwards) but also provide coaches with a lot of statistical data about how their teams are doing without all the hassle of transferring the information from a paper scorebook to a spreadsheet.
Of course, the data is only as good as the person who is keeping the book, but that was also true for a paper scorebook. The nice thing is it’s easier to pull it up when you want to get a feel for how your players are doing.
#12 – The Cost
Most of the changes we have talked about have been positive. This one might be more of a negative.
Back in the day, a typical team fee for a travel ball team was $400 – $800 dollars, either with or without uniform. Those fees would cover not only tournament and practice field fees but also team equipment such as bats, helmets, and catcher’s gear.
(Yes Virginia, in the old days teams would actually supply a few bats and helmets for shared team use. We’ve come along way since then.)
These days travel ball fees can run into the thousands of dollars. It’s not unusual for families whose daughters are playing on high-level teams to pay $10,000 a year or more, not counting travel fees which are additional.
Sure, we can talk about inflation and the numbers not quite being the same. But I guarantee even if you account for those differences the cost has gone up significantly.
The price of progress, I suppose. But it does mean young ladies who once might have been interested in playing fastpitch softball have now been priced out of the market, unfortunately.
Ok, those are some of the changes I have seen. What have I missed? What have you seen change within your time in the sport, whether that’s two years or 20 years? Leave your thoughts in the comments section below.
What’s the Deal with the Colored Tape on Catchers’ Chest Protectors?

If you were watching the Women’s College World Series in 2023 and/or 2024 you no doubt noticed that Oklahoma’s catchers had a piece of blue or red tape affixed to their chest protectors. I have heard some interesting explanations as to what it might be.
One is that it’s some sort of enlarged target for pitchers to throw to. If they’re having trouble seeing the glove, or if the catcher is trying to hide the pitch location, the pitcher can sight in on the tape and throw it there.

Another is that the tape is the pitcher’s favorite color, and it’s being used to help her feel more comfortable and confident. That’s more on the right track, but still not quite there.
Actually what it is has to do with something called motor preferences. You can learn more about it here, but I will provide a quick background of what it is and how it relates to the colored tape.
The concept of motor preferences began about 20 years ago with a French company called Volodalen. They were doing extensive research in how to help athletes in many different sports (but primarily in track and field and cycling, I believe) perform better.
Through this research they discovered that all of us have certain preferences baked into our DNA. For example, when some people run they tend to bounce or rebound lightly off the ground.
They classified these athletes as “aerial.” Others tend to be more earthbound, pulling and passing as they run, so they call them “terrestrials.”
There are other tendencies as well, which I’m not going to get into right now because while I have completed an online course I want to wait until I’ve attended the in-person training to go into it in more detail. So I don’t quite feel qualified yet to offer a deeper explanation.

Motor preferences have been used in Europe for about 20 years to determine an athlete’s natural preferences so he/she is being trained properly, both to enhance performance and prevent injury. It was brought to North America by Motor Preferences Experts, whose link I provided above.
Which brings us back to the tape on the chest protectors. The color and the orientation both have significance in how they affect the pitcher.
The color is determined by whether the athlete holds his/her breath in while performing an athletic movement or lets it out. In this case, an athlete who holds his/her breath in will have a preference for royal blue. (As I understand it not just any blue will do, it has to be royal blue.)
An athlete who empties his/her lungs during the act will have a preference for red. I’m told any general red will work. All of this has to do with the rods and cones in the eyes.
There is a test to determine whether an athlete is breath in/breath out You don’t want to just ask them. That test is proprietary so I can’t share how to perform it here but I will say it’s fairly subtle so you need to be trained in it anyway.
Once you know the color, you then test to see if the athlete’s brain organizes information horizontally or vertically. That will tell you whether to run the tape horizontally or vertically on the chest protector.
Getting back to our pitchers, if the pitcher tests breath in vertical, you would want to place a royal blue piece of tape on the chest protector in a vertical orientation. If she is breath out vertical you would place a red piece of tape vertically, and so on.
The purpose, at least as I understand it, is to help the pitcher feel more relaxed and confident before she goes into her pitch. Perhaps more focused as well, all of which will hopefully help her pitch better.
The colors and orientation isn’t just for pitchers, by the way. Hitters can put a piece of the correct tape on their bats before they get into position to help them prepare to hit. Teams can put stripes up in the dugout to help their fielders before they take the field, or fielders can put a piece of tape on their gloves.
The good news for those of us who are still learning how to test is that if you mess it up and get the color or orientation incorrect there is no negative consequence, at least as I understand it. You’re just not helping the athlete the way you were hoping to.
I hope that clears up some of the mystery around the tape. While the whole motor preferences concept has only been in the U.S. for a couple of years I think awareness is starting to grow and more organizations are starting to look into it.
Consider the colored tape the “gateway drug” into the deeper world of motor preferences and how they can help your athletes perform better and avoid significant injuries. More to come on this topic after I go through the training.